Navigate / search

Banana-lama-ding-dong

Soooooo apparently my crack at relationship analysis was a flop, because no one commented.  At all.  And I know you read it, because I can see the numbers.  It’s like magic.

Maybe no one wanted to tackle such a difficult question?

Maybe you were afraid I’d tear you to shreds with my lioness prowess if you dared counter my opinion?

Rawr.

Anyway.  I guess this means I need to stick to recipes and travel and backsplashes and embarrassing stories and not-so-embarrassing stories.

Because it’s not what I know – it’s how convincingly I act like I know what I don’t really know.  You know?

But if there’s one thing I really do know, it’s that almost nothing will make your house smell better on a cold winter day than a baking loaf of banana bread.  Except maybe Snickerdoodle flavored hot cocoa.  But that’s more of an in-your-nose type of smell – not a makes-you-want-to-lick-the-walls-in-your-kitchen-because-the-snozzberries-taste-like-snozzberries type of smell.

But the banana bread?  It makes me want to lick the walls.

Banana Bread

Is that weird?

Banana bread is not something I never really set out to make.  It’s just what happens when we neglect to eat our bananas and they start to get all brown and nasty looking, and then we really don’t want to eat ’em.  So they either go to the dogs, or to the bread.  Those dark, mushy, horrible-looking bananas are perfect for banana bread.

I actually mixed a bunch of recipes together to come up with this one.  The nice thing about these dense bread loaves is there is definitely room to play when it comes to flavor.  Think you might not want it as sweet?  Cut back on the sugar.  Think you want it spicier?  Add more cinnamon and nutmeg.  Want it richer?  Add chocolate chips.  Want it to have that disgusting texture that happens when you add nuts to something that should be smooth?  Add nuts.

Anyway, my point is that you don’t need to make it exactly this way just because I made it this way.

Even though you should make it my way, because my way is best.

Just sayin’.

Here’s what I used:

  • 1/2 cup butter, softened
  • 1/2 cup white sugar
  • 1/2 cup brown sugar
  • 2 eggs
  • 3 mashed bananas
  • 1 1/2 cups flour
  • 1 teaspoon baking soda
  • 1/2 teaspoon vanilla
  • 1/4 teaspoon cinnamon
  • 1/8 teaspoon nutmeg

If you’ve never made a loaf of dense bread like this, I’m telling you there’s really nothing much easier.

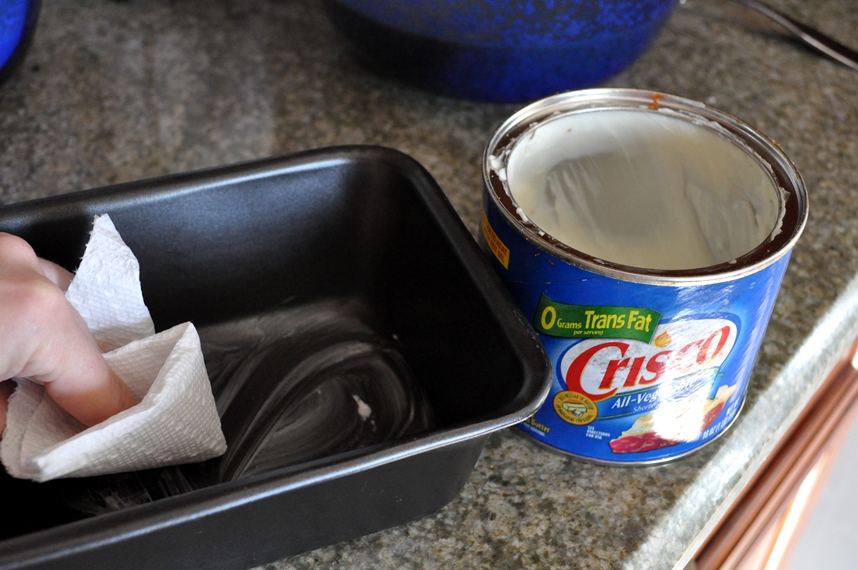
1.  Start by preheating your oven to 350-degrees F.  Grease and flour a 9×5″ loaf pan.  You might be able to use that nonstick spray stuff, but when it comes to baking, I usually prefer good old-fashioned Crisco and flour.

Just use a paper towel to spread the Crisco around the bottom and sides of the pan…
…Then plop a spoonful of flour into the pan…

…And then shake and rotate the pan around (preferably over a trash can) until the flour coats the whole thing.  Just dump out the excess flour when the pan’s fully coated.

Your grandma would be so proud!  Except for the fingerprints you left in the grease.  Grandma wouldn’t leave fingerprints in the grease.

Moving on…

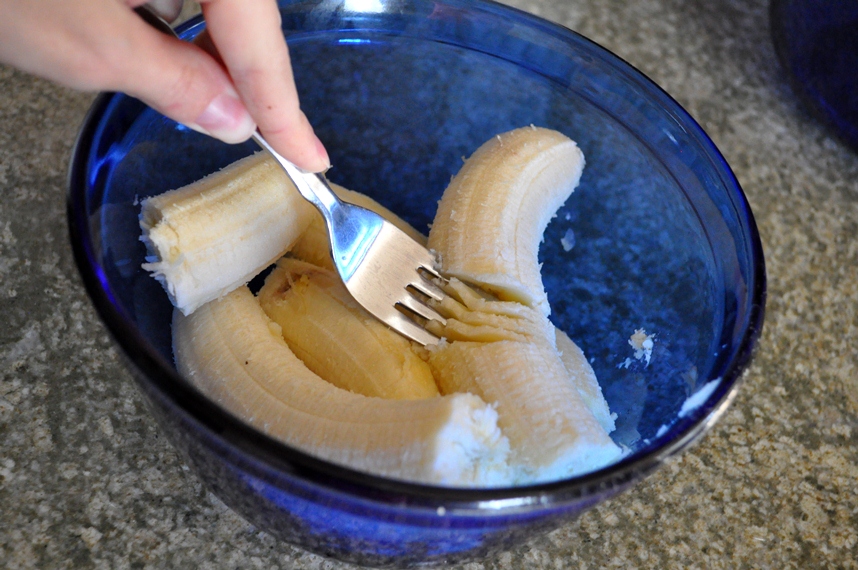
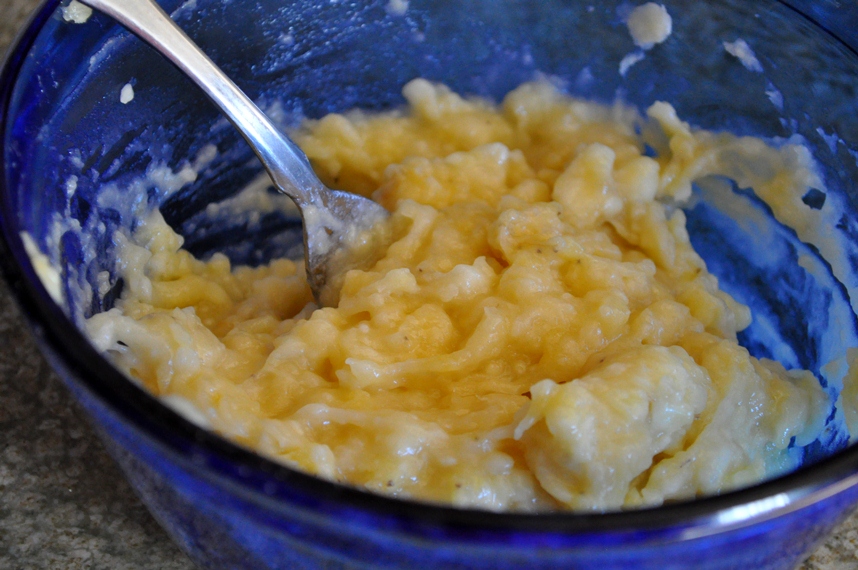
2.  Grab your really brown, overripe bananas and mash ’em up with a fork.

This should be fairly easy if your bananas are at the optimal level of ripeness.
2.  In a separate bowl, cream together the 1/2 cup of softened butter, the 1/2 cup of white sugar, and 1/2 cup of brown sugar.
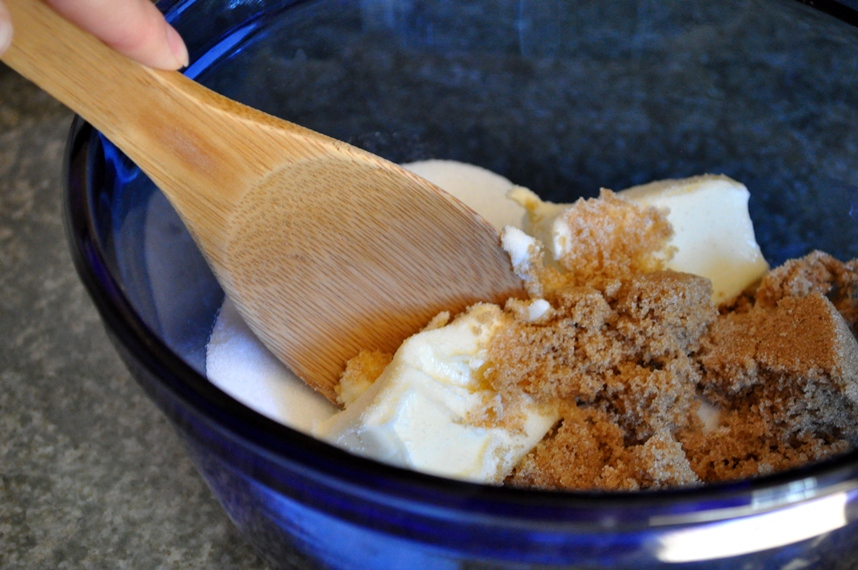
3.  Move the mixture to the side of the bowl, and add the 2 eggs.

Beat the eggs with a fork.
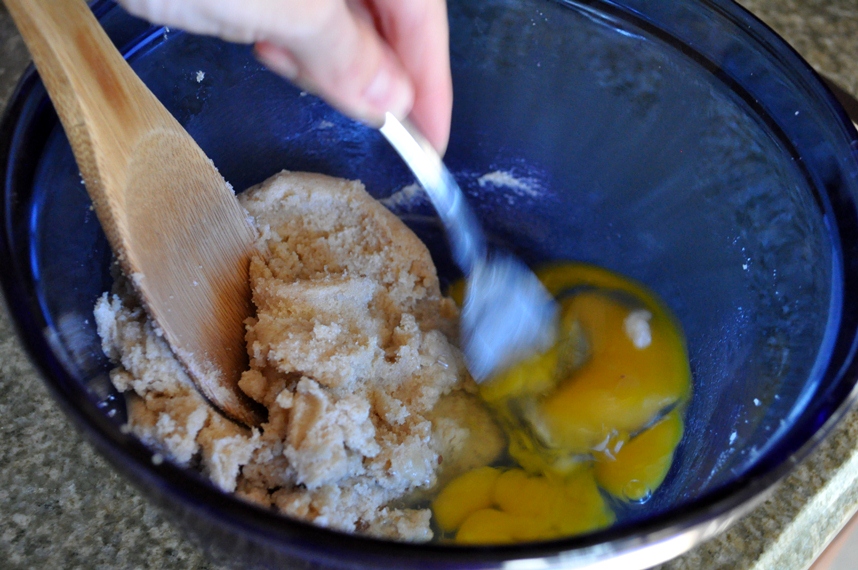
Mix the eggs in with the butter/sugar mixture.

Booyah!  I just saved YOU from another dirty bowl.

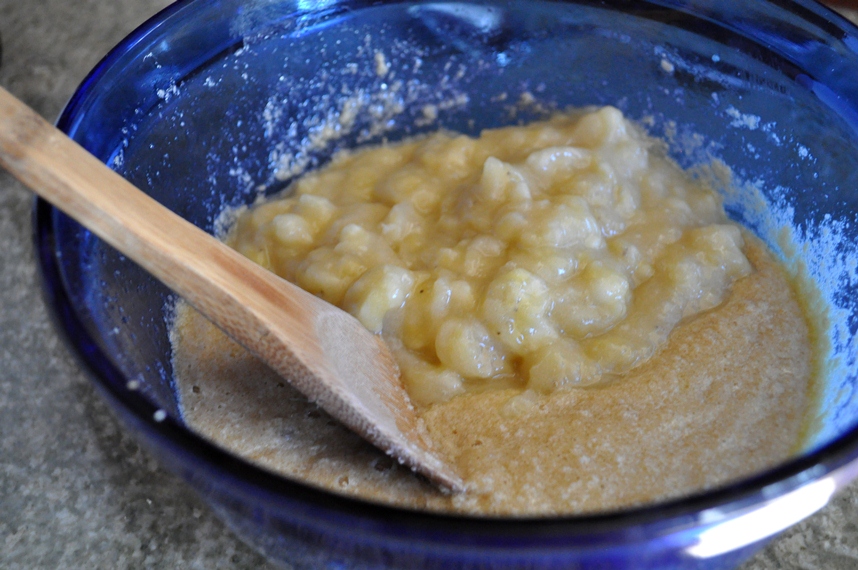
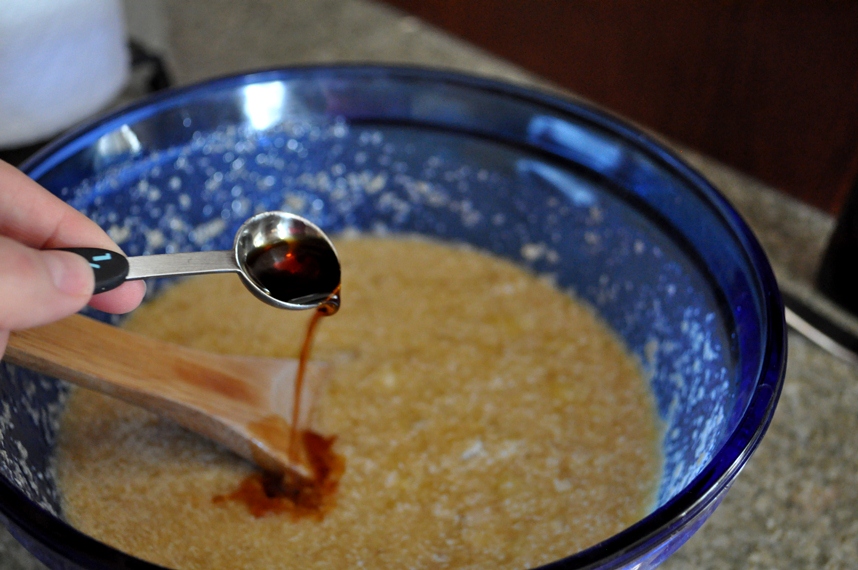
4.  Stir in the vanilla and mashed bananas.
5.  In a separate bowl, mix together the 1 1/2 cups flour, 1 teaspoon baking soda, 1/4 teaspoon cinnamon, and 1/8 teaspoon nutmeg.
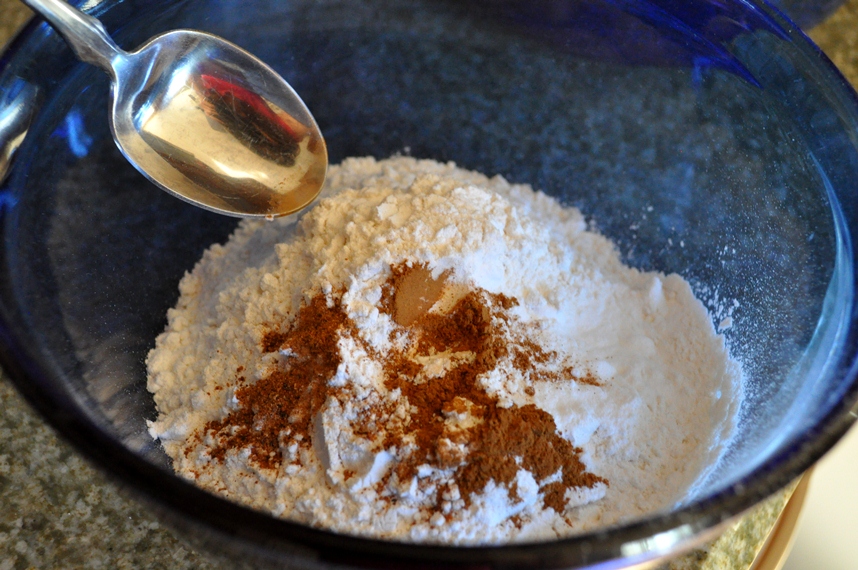
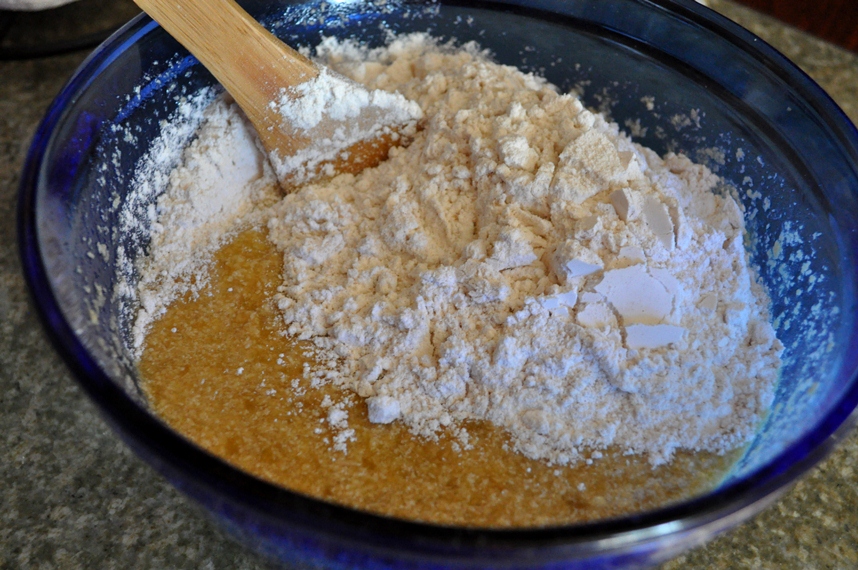
6.  Add the flour mixture to the banana mixture, and fold it in just enough until everything is moistened.  You don’t need to overwork it at this point.
7.  Pour the batter into the prepared loaf pan, pop it in the oven for around an hour, and let the heavenly smells commence.
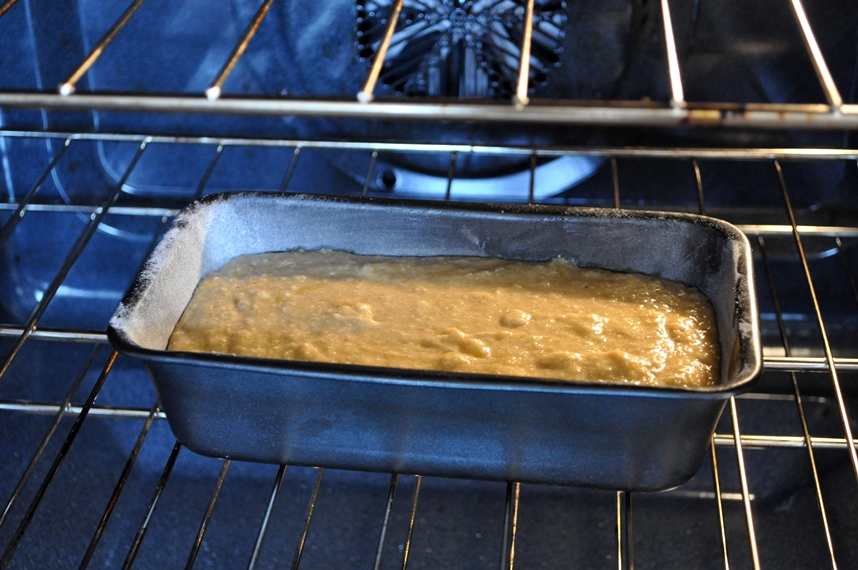
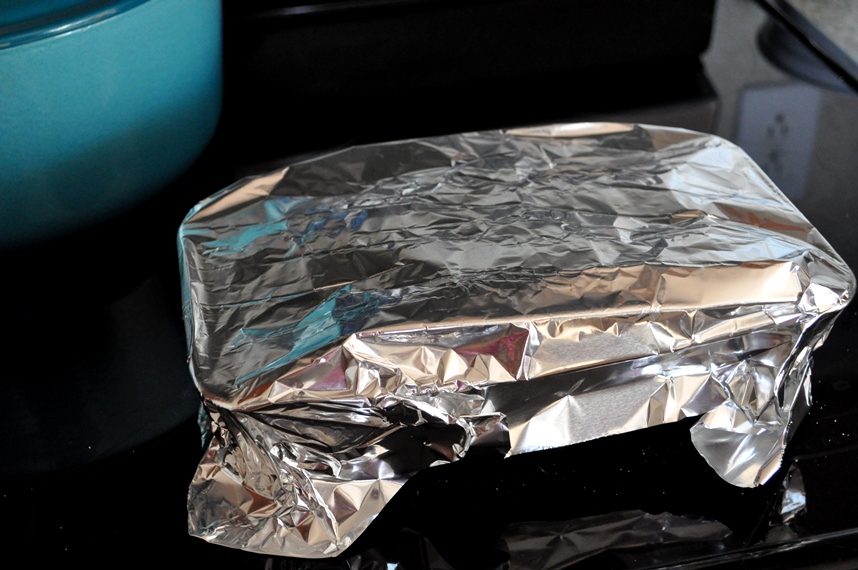
About 50 minutes into the cooking time, the top started to look a little dark even though the center was still undercooked.  This happens because my oven sucks.  If your oven sucks too, just cover the loaf loosely with foil and commence with the baking.
You’ll know it’s finished when you insert a toothpick in the center and no bread boogers stick to it when you pull it back out.

8.  When she’s done, pull the loaf out of the oven and let her cool for a minute or two before you remove her from the pan.  (I suddenly have this inexplicable feeling that my loaf is a girl.)

Let her pose for a couple of pictures.

You know she wants it.

Banana Bread

Before she cools down too much, run a knife along the edge to loosen her up and then tip her out onto a cooling rack or plate.

If you’re lucky, you can slice and eat while it’s still warm.

Immediately spread with a little butter or margarine so it gets nice and melty…

Oh my.

Ooh baby.

You know I can’t resist your sexy dance of seduction…

Until next bite, my friend.

Until next bite.


Tips From the Pros: How to Satiate Those Late-Night Cravings

EDIT:  It has been brought to my attention that it might not be easy to pick up on my intended sarcastic tone in the following post.  Therefore, this is your notice that if there were such a thing as a “sarcasm font,” this post would surely be written with it.  Thank you.

Just when I thought I was in a heap of trouble and started to become desperate because I’ve finally, officially, gotten sick and tired of trying to figure out what to make for dinner night after night*, the ultimate foodie guru Rachael Ray has come to my rescue.

*Note:  It’s not the physical act of cooking I can no longer stand – it’s the pouring over recipes online looking for something new and interesting and not eight-five thousand calories and doesn’t contain crazy-expensive ingredients and doesn’t make more than enough to feed 8 people and why isn’t there a cookbook out there called, Katie, This is the Cookbook You Need.  Buy Me and You Will Never Have to Search for Another Recipe Again?

So last night I got home late.  With this new job at the bar, I’ve gotten used to feeling awake as though I’ve drunk 3 cups of coffee in the middle of the night; the ghostly darkened roads with blinking lights devoid of traffic; and the dark, quiet house where even the dogs don’t want to wake up to greet me.
But what I can’t, for the life of me, seem to adjust to is the feeling that I am absolutely starving at 2 o’clock in the morning.  I might eat dinner at 4 to get to the bar by 5, and then, before I know it, 9 hours have passed and I’ve barely had time to take a few sips of water, let alone snag some bar food from the kitchen.

So.  All I have to say is, thank God for Rachel Ray.  She has seriously saved me with this recipe:

Late Night Bacon.

Photo source

Now, I realize it sounds a bit complicated, but bear with me.  You will need 8 slices of bacon, 4 sheets of paper towel, and a microwave-safe plate.  Oh, and a microwave.  Place 2 of the paper towels on the plate, and place the bacon on top of that.  Do not, for the love of all that is holy, let your bacon slices overlap.

Now here’s where it gets tricky:  You will need to take the remaining 2 sheets of paper towel and place them over the bacon.  Then place the plate in the microwave on high for 4-6 minutes.

Like I said, it’s a bit complicated, but I’m so thankful to have access to someone like Rachel Ray on the Food Network website to walk me through it.  I mean… microwaving bacon instead of pan-frying?  Genius.  Because we all know I shouldn’t be messing with the stove at 2 a.m.  And writing this high-calorie recipe specifically to be consumed late at night?  When my metabolism is probably at its all-time lowest?  Well.  I feel like she wrote it just for me.

And here are some of my favorite reviews from the site, because it’s always helpful to learn from the mistakes of others:

“The recipe didn’t say anything about removing my hand from the bacon, so I ended up microwaving my hand with the bacon and paper towels. I passed out twice from the pain, but once I awoke, the bacon, the paper towels and my hand had all melded into one yumm-o baconey flavored blob, which really was crispy and delicious. I’ve got one hand left, and oh yeah, I’m making this again tonight!”

-latenightbaconman

Wow, thanks for the tip, latenightbaconman!  I probably would’ve done the same thing – I mean, I need my directions to be explicit – so thanks for saving me the headache.  I mean handache.

“Hey Ray Ray! I loved the recipe, but thought it needed something to be a late night meal. Could you please post your recipe for toast? I’d like a recipe for a glass of milk as well, but I don’t think I could do all that in one night.”

-ShanonSharp

Oh, Shanon.  I feel  your pain.  I do.  I mean, it’s late night bacon.  Who has the energy to make an entire glass of milk?  Hopefully Ray Ray will respond with a solution to this problem, pronto.

“Personally, I think this recipe could be improved by the addition of a bit more bacon and a bit less paper towel. The taste of the towel was pretty good with all that bacon grease on it, but the texture was *awful*. I’ve tried this preparation a few times for my guests, and they always leave the towels behind. Sometimes slightly gnawed, but it’s clear they don’t enjoy them.”

-BaconMan

Ooh, nice suggestion, BaconMan.  I can really see how reducing the amount of paper towel might improve the overall flavor of this recipe.  Or maybe you could try what yet another reviewer suggested and marinade the sheets in Pam first?  It’s worth a shot…

Photo source

Chicken Salsa Biscuit Things

As I sit here drinking a cerveza, thinking about what to write on this thing that some people are actually reading, and contemplating life in general, I’m starting to think I was too harsh in my assessment of drunk-in-public people from last night.  I mean… if someone wants to hit on me regardless of whether I can understand what he’s saying between hiccups and slurs (something about my ponytail and my nice smile, but that’s all I could make out)… or if someone wants to literally attack my manager and rip her shirt because she thinks she’s hitting on her boyfriend… or if someone wants to vomit all over the floor in the ladies’ restroom… who am I to judge?

*One of those 3 things has not happened (yet) at my place of employment – anyone care to guess which one?

I mean, if you’re someone who’s never done something remotely stupid or regrettable in your life, then I probably don’t know you.  Because you probably don’t exist.

And while there are surely many negative aspects of getting stupidly drunk, one of the inarguable positives is that you gain the uncanny ability to eat the crappiest of foods completely guilt-free.

Which brings me to my recipe for tonight.  A recipe that, coincidentally, I’ve never made or eaten while intoxicated.  Which proves I’m horrible at segues.  But it is one of those things you might look at and think, Umm, no.  I will not be making that for dinner.  Ever.  It’s juvenile and you can eat it with your fingers and for crying out loud, what IS it with you and those damn tubes of biscuits that scare the panties off me when they pop open??!!?

But the thing is, sometimes we need food like this.  Sometimes we crave it.  Something simple and fun and tastes really really great with a beer.  Or a soda.  Or a big glass of milk.

I used to make these for my favorite guy friends and they went down quicker than Courtney Love when courted with Heart Shaped Box.

I call them Chicken Salsa Biscuit Things.  And the original recipe is found here.  They’re basically like homemade hot pockets, but So. Much. Better.  And you can customize them any way you want.  Like more filling?  Add some mushrooms, or shrimp, or bell peppers.  Like more flavor?  Add some cilantro, minced garlic, or red pepper flakes.  Like more heat?  Add your favorite hot sauce.  The sky’s the limit!

But here’s what you need to make ’em my way, usually in their most basic form (I like to keep it simple):

  • 3 skinless, boneless chicken breast halves (I actually usually only use 2 if they’re pretty big)
  • 1 chopped onion (I actually skip this sometimes when I’m feeling particularly lazy… I use a chunky salsa to make up for it)
  • 1 cup salsa (I use Pace mild thick ‘n chunky – or something along those lines)
  • 2 cups shredded cheddar cheese (I try to freshly grate cheese to avoid all the extra additives and preservatives and gunk they put in the pre-shredded stuff in the bag, but again, this is a lazy recipe.  Sometimes I do what I gotta do.  And the recipe uses refrigerated biscuit dough – who are we kidding?)
  • 1 (12 oz.) can refrigerated biscuit dough  (NOT the flaky stuff – just regular, original biscuits.  Or the buttermilk kind.  Whatever floats your boat.)

1.  Preheat your oven to 350-degrees F.  Set your tube of biscuits on the counter (I find they’re a bit easier to work with if they’re less chilly).

2.  Start off by boiling some chicken.  Just get a pot of water boiling, add your chicken breasts, and cook them for around 15-20 minutes until they’re no longer pink and the juices run clear.  When they’re done cooking, remove them to a plate and shred them with a couple of forks – or a fork and a knife, depending on how dangerous you feel.

*My little photo disclaimer still stands – I am still sans my favorite lens AND Photoshop, so I’m doing the best I can.  Please don’t judge me by these images.  Thank you.

Shredded Chicken

3.  If you’re using an onion, dice it and sauté it in a sauce pan until it’s soft.  The recipe doesn’t say this, but you’ll probably want to use a little butter or oil.  Like I said before, I tend to skip the onion since I use a chunky salsa.  Add your cup of salsa to the pan and let it heat up for a minute or two.  Then add the 2 cups of shredded cheese and let it kinda sorta melt.  I usually remove the pan from the heat just before adding the cheese.  It’s okay if it doesn’t melt all the way because you’ll be cooking these babies in the oven.  Finally, add the shredded chicken.

Chunky salsa.  Mmmm.

Stir, stir, stir.

Add shredded chicken.

4.  Open that crazy tube of biscuits (why are they so scary???) and flatten them out with your fingers on an ungreased cookie sheet.  Fill them with your chicken/salsa mixture and fold up the biscuits to form these nice little pockets.

Flatten dough.

Fill biscuit.

Fold dough.

5.  Bake at 350 until the biscuits are golden and cooked.  Pay attention because in my oven, these often take less time.

I’ll have you know that these have a tendency to pop open while they bake.  And if they happen to pop open on you, it in no way means you are an inferior human being.

They are warm and cheesy and delicious.

And they happen to be excellent to grab for quick lunches or to gobble down in the back kitchen before you go wait tables at  your favorite local pub.

Just sayin’.

Enjoy!

Bustin’ Out the Chops

In case you haven’t noticed, I’ve been avoiding the use of photos in my posts for quite a while now.  The reasons are painful and twofold:

1.  My favorite lens is still busted.  I don’t feel justified in sending it in to have it fixed until I have an actual job.

2.  Since my computer broke when I went to Miami, I haven’t yet reloaded Photoshop onto it.  My kitchen tends to be pretty dark when I cook (and has a weird mixture of recessed and under-cabinet lighting, which makes the photos look a little strange.  I like to use Photoshop to fix the color.

But today?  Screw it.  I need some pictures in my life.  It’s been far too long.  So PLEASE ignore the strange colors.

I managed to find some photos of a recipe I made awhile back when we had guests from out-of-town.  I’m sure they thought I was a complete nut, cooking away in the kitchen and pausing every few minutes to take a picture.  Because, you know – I’m that good.

I tend to freak out a little when I have to make something for other people.  Why?  Because I have this annoying habit of screwing up in the kitchen.  A LOT.  But I’m usually good about laughing at myself when that happens, and Justin will eat just about anything.  It’s a little different, however, when you have other people – other hungry people – depending on you for their sustenance as well.

So I made my “fall-back” company recipe that always goes over well if I have non-vegetarian guests.  It’s actually my mom’s recipe, and I love how old-school it is.

Baby, it’s PORK CHOP TIME!

First, you’ll need a big ol’ one of these:

(Like I said before, please ignore the odd color of these photos.  It’s the crazy lighting in my kitchen and lack of Photoshop.)

Wow.  Is anyone getting turned on?

No?  It’s just me?

Ahem.

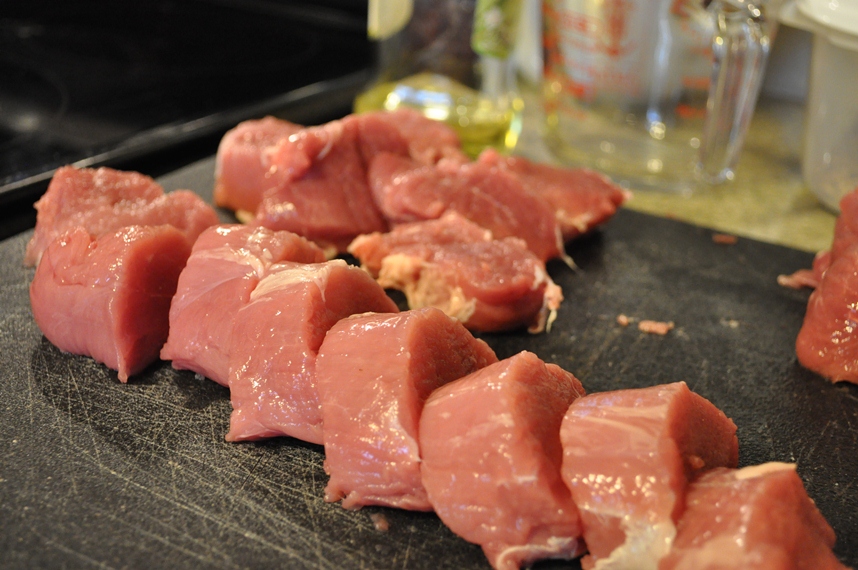
This is a pork loin.  So technically I made pork loin, not pork chops – but this recipe works just as well with about 4 chops.

And actually, I’m not positive if this is one loin split lengthwise into 2, or if this is 2 skinny loins.  Hey, I just buy the meat and cook it.  I don’t claim to be an expert.

So you see how it’s split lengthwise down the middle?  Just chop each of these strips up into little pork medallions.  They end up all small and adorable, and they cook much quicker this way than larger pork chops.

Pork Loin Medallions

Here’s what else you need:

  • 2 c. (about 3 slices) of bread, ripped into small cubes
  • 2 Tbsp. chopped onion (or the equivalent of dry minced onion)
  • 1/4 tsp. poultry seasoning
  • 2 Tbsp. water
  • 2 Tbsp. melted butter
  • 1/3 c. Marsala wine (this is usually found in the grocery aisle with all of the cooking wines/vinegars)
  • 1 (10 3/4 oz.) can of cream of mushroom soup

1.  Go ahead and get your oven preheated to 350-degrees F.

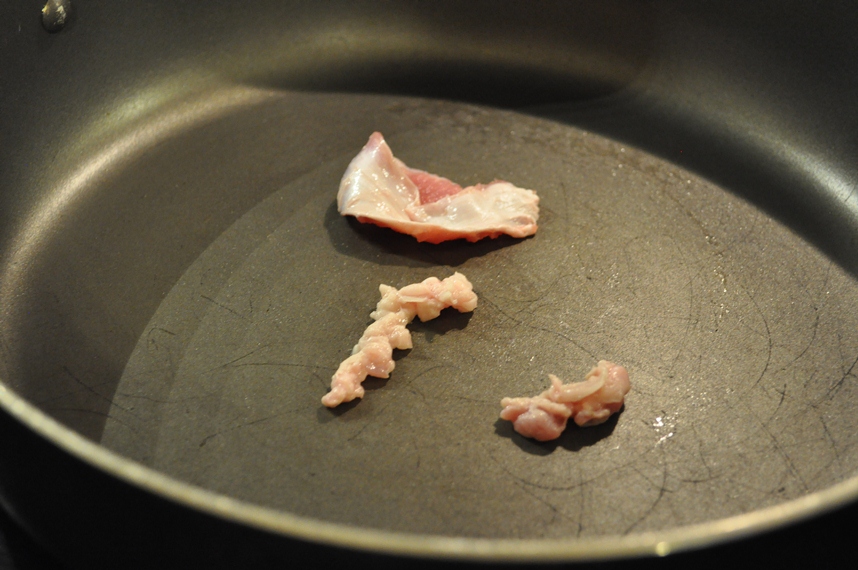
2.  Put some type of large skillet on the stove over medium-high heat, and grease it with a piece of fat from your pork.

3.  When the skillet is good and sizzlin’, brown the medallions for a couple a minutes on each side.  (Do this in batches if you can’t fit them all at once.)  Once they’re browned, place them in a single layer in a shallow casserole dish.

*I actually should’ve had my skillet a bit hotter – you want the meat to be more brown than gray, and it should sear fairly quickly.  You don’t want these to cook through on the stove because  you’ll be baking them in the oven.

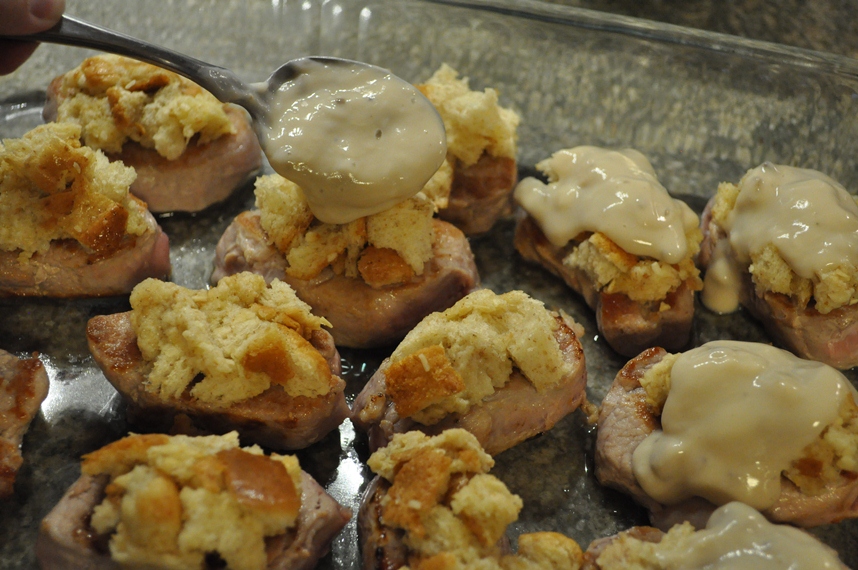
4.  In a small bowl, combine the 2 cups of soft bread cubes, 2 tablespoons of onion, 1/4 teaspoon of poultry seasoning, 2 tablespoons of water, and 2 tablespoons of melted butter.  Smush this stuffing-like substance together with your fingers, and press it firmly onto the tops of the pork medallions.

5.  Combine the 1/3 cup of Marsala wine with the can of cream of mushroom soup, and spoon the mixture over each of the medallions.

6.  Then just pop ’em in the oven for 30 minutes to an hour.  I know – what a pain that I can’t give you an exact cooking time!  But it really depends entirely on the thickness of your meat and the heat of your oven.  I have a meat thermometer and cooked them until the thermometer said they were hot enough.

I actually thought I over cooked them because the temperature was quite a bit higher when I checked after about 40 minutes, but the beauty of these little loins is that they stayed nice and tender.  They turned a pretty, golden-brown and still tasted delicious.

Though they weren’t quite this golden.  Again, Photoshop, how I miss you.

Now, because I’m a complete dope and self-admitted domestiphobe, I totally forgot about sides until the last-minute.  Luckily I found a couple of recipes that were really easy to put together.

I served it with lemon pepper green beans and mushrooms with a soy sauce glaze.

Let me just say – I could eat these mushrooms every day for the rest of my life and not get sick of them.  Oh, and they’re sooo easy to make.  This whole dinner was crazy-easy to make.  And judging from the fact that we didn’t have any leftovers, I’m thinking it was a hit.


Glass and Muffins. But Not at the Same Time.

So.  Yesterday I decided to temporarily give up my recently adopted hermit lifestyle (a lifestyle against which I would normally naturally rebel, but the recent and unusually frigid temperatures for this time of year have allowed me to adapt to it quite nicely) and brave the cold to make the hour-plus drive to Raleigh.

But Katie, why would you risk letting the perfect indent your ass has worked so hard to carve out for itself in the couch fill back in during your absence?

Well, the trip is something I’ve been putting off for quite some time.  Near the end of our stay in Costa Rica, I dropped my favorite camera lens (and I only have 2 lenses) in one, horrifyingly painful moment.  Onto a cement floor.  And in a battle of brute strength between plastic and cement, you can guess which one wins.

The glass itself didn’t break, but there was some clear damage done to the body where it mounts to my camera.  I’ve been putting off having it examined by professionals for fear of hearing the worst possible news – that my lens, my little therapeutic amulet of creativity, had officially bitten the dust.

I’ve taken most of my favorite pictures with that lens.

The answer, my friend… Is spittle in the wind….

So yesterday I grudgingly put on a long sleeve shirt (shudder) and a coat (double-shudder), climbed into the Tracker, and floored it all the way to Peace Camera in Raleigh.

I have to say that this place was the coolest little camera shop.  It was packed full of books, beautiful equipment, accessories, and cameras from old timey-times.  I probably would have thoroughly enjoyed it if I hadn’t just handed my precious baby off to some surly looking guy who took her into the “back room” to take a look at the damage – not without first shooting me a pitying and reprehensible look over the top of his glasses after I told him how she met her fate with the cement floor.  You know, the kind of look a mother gives her toddler when she asks him in the middle of a department store if he pooped his pants and he says, “No,” but he, she, and everyone else in a 15-foot radius knows it ain’t true.

That look.  It stings.

The next 20 minutes felt like I was waiting for a friend to come out of surgery.  I mean, it wasn’t like the time I had to wait for my sister to have a tumor removed from her pituitary gland.  Not like that.  That involved my heart clawing its way up my esophagus and sitting at the back of my throat for a few hours, just waiting to expel itself from my mouth and scurry across the waiting room floor of the hospital should it hear the worst possible news.

No, this wasn’t like waiting for a super close friend or relative, but a good acquaintance, nonetheless.  Someone I liked and who had thus far changed my life for the better.

I’ll cut the drama short by telling you the news wasn’t good.  He was able to fix it so it mounted to the camera, but the autofocus just won’t respond.  It’s like her legs are there, everything’s attached, but they just. won’t. move.  So I’ll need to send her into Nikon and pay what will likely amount to half the cost of the lens in order to get her back in full-on working condition.  And even if I do eventually get a job and send her in for the necessary repairs, I’m worried she’ll never be the same again.

So this morning I needed some comfort food.  Something to lift my spirits.  And in my experience, warm muffins on a cold winter morning are the perfect remedy for this little ache I have in my belly – an ache not only caused by the news of the near-irreparable damage I did to my lens, but also likely derived from the fact that almost all of my electronic equipment as of late has decided to give me one big fat middle finger.

I’m seriously about ready to chuck it all and move to an off-the-grid cabin in the middle of the jungle.  But then I probably wouldn’t be able to make muffins.  And these were good.

I didn’t take pictures of the process because – let’s face it – I was in a craptastic mood this morning and didn’t want to be reminded of the fact that it will likely be a long time before I can take any food pictures with my favorite lens again.  But they smelled so dang good by the time they were done that I had to snap a few.

The recipe can be found here (this girl is brilliant when it comes to making healthy food that also happens to taste good), and the only thing I changed was that I used golden raisins instead of regular raisins.  And here’s the thing about raisins – they taste good, but what is with that texture??  I’m not sure how I felt about the wrinkly little squishy things in my muffins.  But the good news is that you could leave ’em out if you’re not sure either.  The muffins would, however, be delicious with chocolate chips.

Whole Wheat Pumpkin (Raisin) Muffins

You will need:

  • 1 c. whole wheat flour
  • 2/3 c. white flour
  • 1/2 c. sugar
  • 1 tsp baking soda
  • 1 tsp ground cinnamon
  • 1/4 tsp. nutmeg
  • 1/2 tsp. cloves
  • 1/2 tsp baking powder
  • 1/2 tsp salt
  • 1 c. canned pumpkin (not pie filling – just plain pumpkin)
  • 1 large egg
  • 1/3 c. water
  • 1/4 c. olive oil
  • 1/2 c. raisins (optional)

Directions:

1.  Preheat your oven to 350-degrees F and spray a 12 cup  muffin tin with nonstick cooking spray.

2.  In a medium bowl, mix together the dry ingredients (first 9 ingredients).

3.  In a small bowl, stir together the wet ingredients (last 5 ingredients).

4.  Very gently stir the wet ingredients in with the dry, just until everything is moist.  (Erin will hate me for using that word, moist. It disturbs her.)  The point is to not over-work the batter.

5.  Spoon the batter evenly into 12 greased muffin cups.  Then bake at 350-degrees F for 22-25 minutes (or in my crazy-hot oven, 20 minutes at 345-degrees).  They’re done when a toothpick inserted in the center comes out clean.

Whole Wheat Pumpkin Raisin Muffins

6.  Let them cool for about 10 minutes in the pan, then dump them out onto a wire rack.

Oh my.  These made my kitchen smell like Christmas and hugs.  It didn’t even matter that I was the only one eating them this morning – they were pure comfort in the convenient form of little round muffins.  And they’re fairly healthy, so I didn’t even feel bad that I ate 6 of them.

*cough*

Okay!  Don’t give me the look the mom gives the poopy pants kid!  I only ate 2.

So far.

I Tart You.

Sometimes being part of the military means you can’t always visit family for the holidays.  But it also means you have family wherever you happen to be.  Thus, we celebrate Thanksgiving with other military families almost every year.  We can gather with friends, fry up a couple of turkeys, and everyone contributes one or two dishes.  It certainly beats cooking every part of the meal, and it’s definitely better than our Pizza Hut Easter tradition.

Ahem.

My contribution this year was a combination of 2 recipes:  Pecan Pie Tarts and Whiskey Maple Cream Sauce.  The tarts were delicious and bite-sized, and they tasted even better with this rich, creamy sauce drizzled over the top.

Since the sauce is supposed to be chilled, I started with that and made it the night before.

You will need:

  • 1 1/2 cups of heavy cream
  • 5 tablespoons of pure maple syrup
  • 3 tablespoons of light corn syrup
  • 1 tablespoon of whiskey

Easy peasy!

1.  In a sauce pan over medium-low heat, combine the first 3 ingredients and stir them constantly for about 20 minutes.  The mixture will bubble and thicken.

Whiskey Maple Cream Sauce

2.  Remove from heat, add the whiskey, and then put the pot back on the heat for another 5 minutes or so.

3.  Put in the fridge overnight to chill and thicken.  Doesn’t get much easier than that!

Now for the Pecan Pie Tarts.  I doubled the original recipe and used a bit more cream cheese than called for because I wanted to use the entire brick.

To make about 40 tarts the way I did, you will need:

  • 8 oz. cream cheese, softened
  • 1 cup butter, softened
  • 2 cups flour
  • 1/2 teaspoon salt
  • 2 eggs
  • 1 1/2 cups packed dark brown sugar
  • 2 tablespoons butter, melted
  • 2 teaspoons vanilla extract
  • 1 1/3 cups chopped pecans

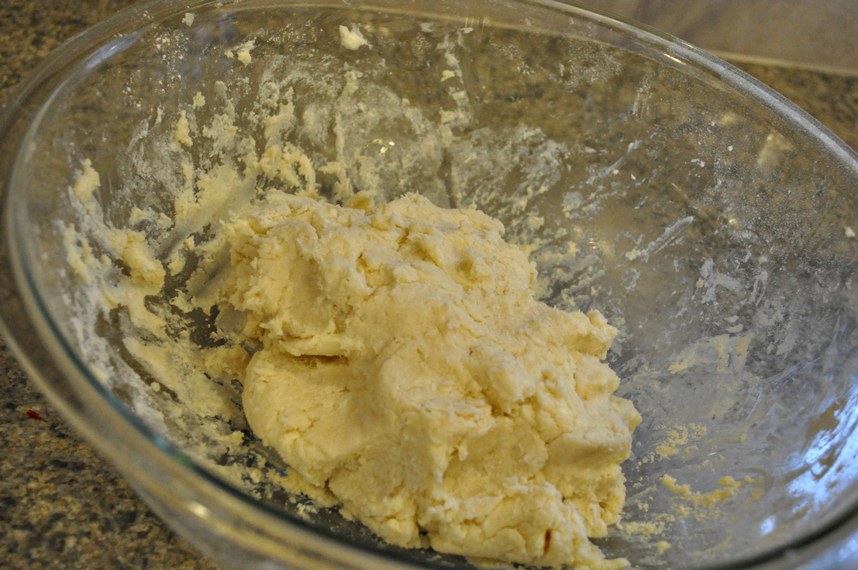
1.  Beat together the softened cream cheese and butter until creamy.  Then add the flour and salt, and mix until it forms a dough.  I used my hands for this part.

Cover the dough and chill in the fridge for about an hour.

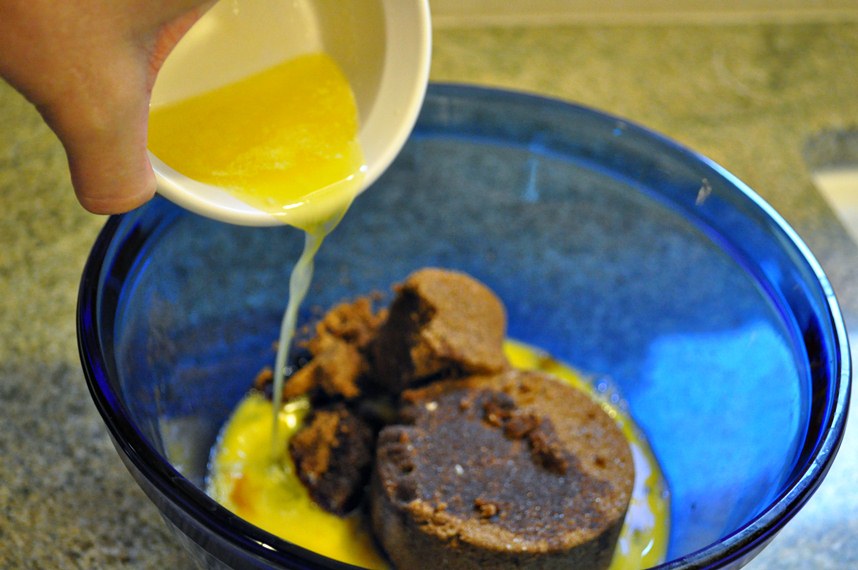
2.  While the dough is chilling, mix the eggs, dark brown sugar, melted butter and vanilla extract together in a bowl.

I cannot tell you how much I miss my broken low-light camera lens right now.

3.  Chop up the pecans (even smaller if they came pre-chopped), and mix those in as well.

4.  Now comes the fun part.  Okay, it’s tedious.  Very, very tedious.  But it’s worth it, I promise!  Preheat your oven to 325-degrees F.  Grease 2 mini muffin tins (this will make about 40 tarts) and press the dough into the bottoms and sides of the greased cups.  Then fill each one with the pecan mixture to just below the edge (these will rise a bit, so don’t fill right to the brim).

5.  Then bake these puppies at 325-degrees for 25-30 minutes.  Cool them in the pan on a wire rack, and then pop them on out.  They should come out fairly easily if you greased the pan well.  When you’re ready to serve them, drizzle them with some of the chilled whiskey cream sauce.

Wow.  This sauce puts these things way over the top on level of divine, splurging deliciousness.  WowWowWow.

Now I realize this is decidedly Thanksgiving-y-ish food, but I could definitely see this whiskey cream sauce making a comeback around Christmas.  Even if I have to pour it over my sugar cookies.  Even if I just have to drink a bowl of it for breakfast.

Would that be bad?

Or bad in a good way?

Tuscan Soup for the Soul

You may have heard that I recently lost the contents of my hard drive and have effectively been working my way through bottles of red wine at a fairly alarming pace.

IT’S ALL LIES!

Okay… I actually did lose the contents of my hard drive.  Which sucked.  And I am going through bottles of red wine at an impressive pace.  But that’s not unusual.  In fact, I think I’m handling the loss remarkably well.  It’s like I’m on the losing end of a one-sided breakup, and I have to work my way through the stages of grief.  Plus, the red wine therapy contains loads of antioxidants, so it’s really a win-win situation.

First, I was in denial.  What?  You’re leaving me?  Yeah right.  I’ll call your bluff.  Go ahead and leave.  See what it’s like to spend a night alone.  You’ll be back.

Once the shock wore off, the pain arrived.  In waves.  I might’ve cried a little.  You’re really gone?  You just took all my pictures and left?  I miss your smell.  My world is so EMPTY without you in it.

But once I realized how ridiculous it was to cry over a piece of electronic equipment, I got angry.  Very, very angry.  I blasted the angry chick music.  I paid for YOU.  You owed me at least the courtesy of a WARNING before you went off and took EVERYTHING I LOVE away from me.

And I might’ve bargained a little.  Okay, okay, I’ll tell you what.  Just give me back my pictures, and I promise I won’t put you in the freezer again.  Just a FEW of my pictures at least?  Or maybe a page of my writing?  Anything?  Just give me something and all this torture can stop for both of us.  Give me just one picture of a monkey in a tree and I’ll give you a nice, warm bed in the TRASH CAN WHERE YOU BELONG. (I wasn’t quite over the anger stage at that point.)

And now I’m entering the stage of reflection.  I’m only just realizing the magnitude of my loss, and I’d be lying if I didn’t say it hurts a little.  A lot.  And nothing you can say will make me feel better.  It’s just gone.

It’s times like these when I do what any normal woman does for comfort and support.  I’m turning to food.  The air is starting to turn brisk and the skies a little more gray.  Warm, chunky comfort food is the only cure-all – the only thing that will bring forth a warm, chunky Katie.

And since I just made chili this season, I started perusing the web for some more options.  Sausage.  Anything with sausage.  And I found this.

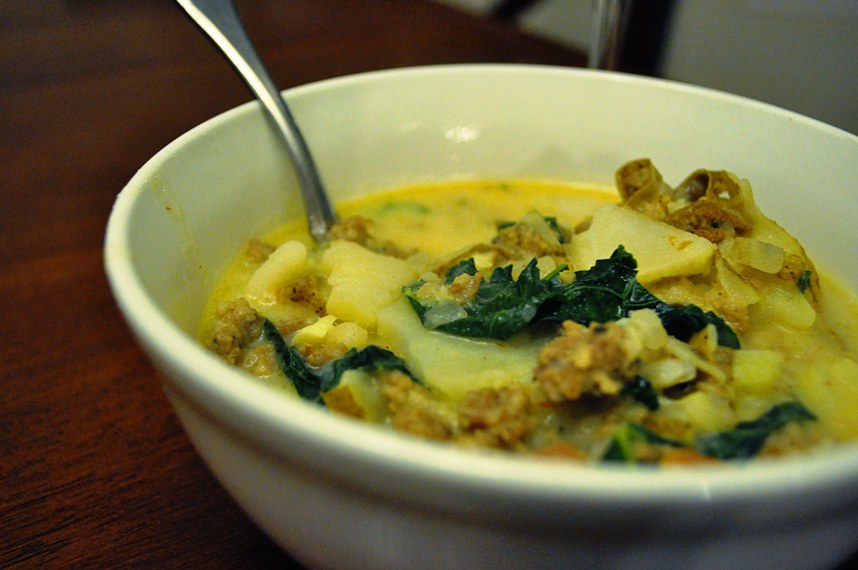
Spicy Tuscan Soup.

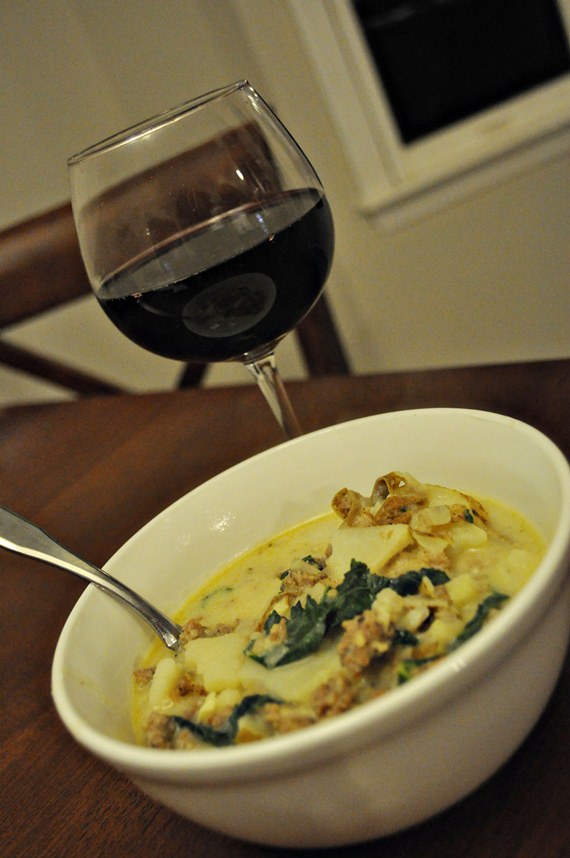
Spicy Tuscan Soup

And like any war-whithered woman post-breakup, I had to have some.  Now.

Here’s what I needed to make it:

  • You Oughta Know by Alanis Morissette blasting background music
  • 1 pound Spicy Breakfast Sausage (I use Jimmy Dean’s Hot sausage)
  • 1 whole Medium Red Onion, diced
  • 2-3 slices Bacon, diced (I used 3 slices.  If you need me to explain why, then you really don’t know me like I thought you did.)
  • 3 cloves Garlic, minced
  • 3 whole Medium Potatoes
  • 1 quart Warm Water
  • 3 cubes Chicken Bouillon
  • ¼ bunch Kale, roughly chopped (I have never used kale before, either.  Don’t be scared.  And I actually have another recipe I’m going to try for the remaining kale from the bunch.)
  • ½ cups Heavy Cream  (This is breakup food, remember! Go with the good stuff.)
  • Salt And Pepper to taste

1.  Get your sausage cooking in a pot on the stove.  Once it’s brown, use a slotted spoon to remove it from the pot and set it aside.  If there’s a lot of excess grease left in the pot, dump  most of that out and dispose.  (Whatever you do, do not dangle your hard drive by its USB cord over the pot of hot grease and threaten to drop it if it doesn’t surrender your pictures immediately.  People will think you are crazy.)

Brown sausage

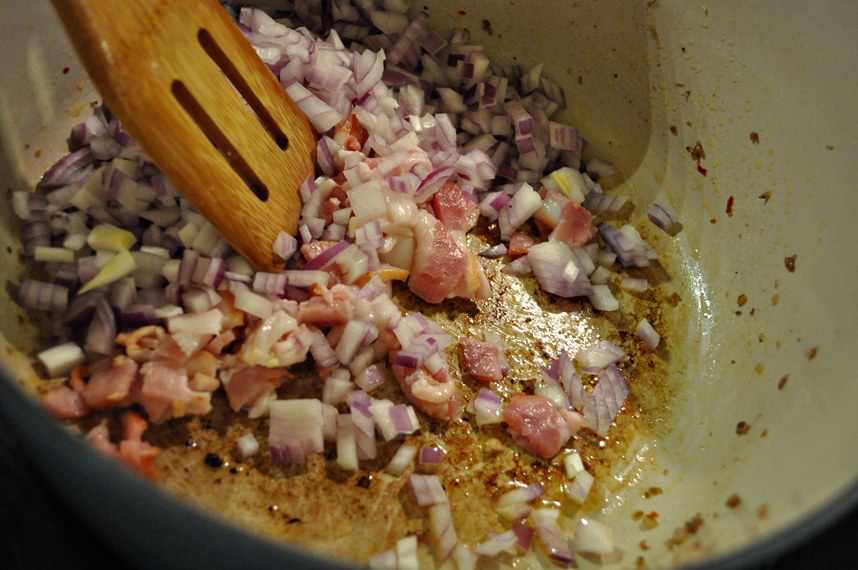
2.  While the sausage is cooking, dice up the red onion, 3 slices of bacon and 3 cloves of garlic.  And SING that angry chick music.  Just don’t close your eyes – that’s not a good idea when you’re holding a sharp knife.  Add the onion and bacon to the (now empty) sausage pot over medium-high heat.  When the onions are cooked (translucent), add the garlic and cook for about another minute.

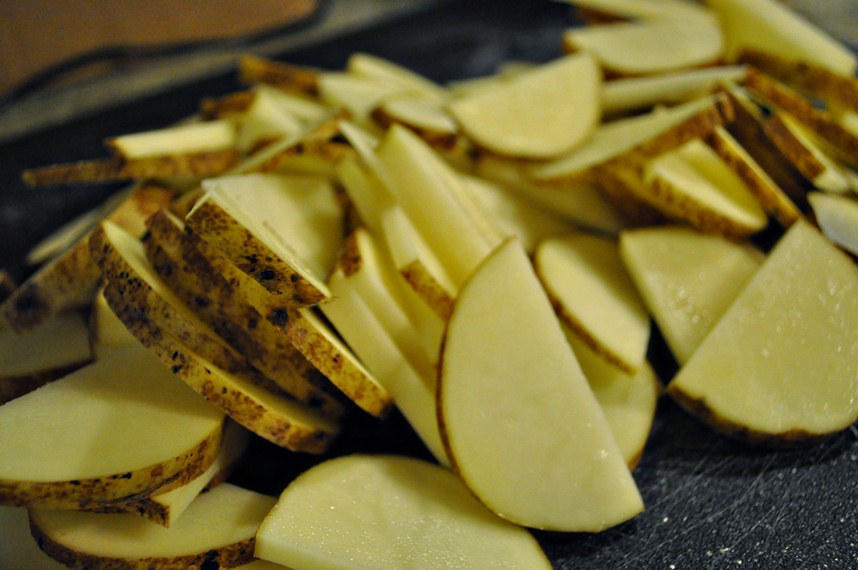
3.  While the onions are cooking, scrub your potatoes (you can peel them too if you’d like, but tater skins don’t bother me so I left them on).  Cut them lengthwise and then chop them into 1/4″ slices.  You can cut them even smaller if it floats your boat.

Sliced Potatoes

4.  Then add the quart of warm water to the pot with the onions.  See all those yummy brown bits on the bottom?  Adding the water will “deglaze” the pot and get all that tastiness worked back up into the soup.  And if you’ve lost all of your pictures from Costa Rica, you need those brown bits.  Also add the 3 bouillon cubes and the sliced potatoes to the pot.  Let everything simmer for 15-20 minutes until the potatoes are soft-ish, but not quite fully cooked.

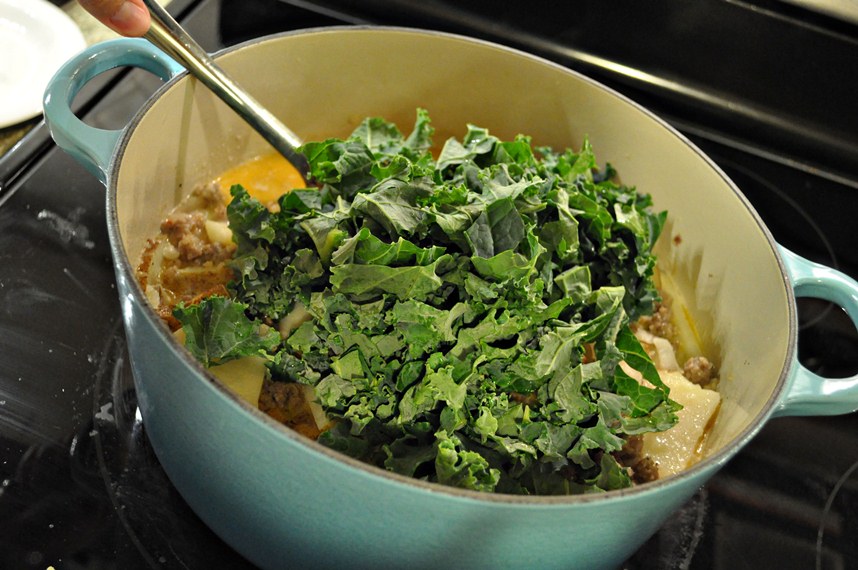
5.  Finally, add the sausage, chopped kale, 1/2 cup of heavy cream, and salt and pepper to taste.  It NEEDS salt and pepper.  Don’t skip this.  Just dip your special tasting spoon on in and don’t stop tasting until you get it the way you like it.  Even if you have to taste and taste and taste.  Let cook for another 5 minutes until the potatoes are soft and the kale has wilted.

Done!  Now eat it.

This hit the spot.  You know, that place on the inside of my upper thighs?  That spot.  And my love handles.  But it’s no big deal, because it’s almost winter and I’m getting over a loss.  I know this soup won’t bring my hard drive back, but it helped bring me to a place of peace and acceptance.

And the wine didn’t hurt, either.


I Dip, You Dip, We Dip*

I know what you’re thinking right now.

“Say what?”  you’re asking yourself.  “Erin’s writing this post?  I didn’t even think she had a kitchen.”

And I know, right?  Everything about this seems to fly in the face of conventional logic.  It’s like we’ve suddenly been thrust into some crazy alternate universe where plants eat people and cats chase dogs and I know anything about food preparation beyond how to read the instructions for microwaving.

Yet here I am, about to give you folks a recipe.

Ok, it probably doesn’t hurt that this is just about the easiest, most foolproof recipe on the face of the planet and requires absolutely no use of the oven, which is good, because that’s where we keep our board games.

Katie introduced me to these dessert balls when she brought them in for a work potluck and a fistfight almost broke out over them (okay, so I started it–but I can’t help that I get territorial about food).  And since I’m going to an honest-to-goodness slumber party tonight, I decided that it would be the perfect occasion to share the disgustingly decadent wealth.

The original recipe can be found on Tasty Kitchen.  But my version comes with witty commentary.  So there.

Anyhoo, hang onto your panties, people, cause away we go…

Chocolate Chip Cookie Dough Truffles

You’ll need to somehow procure the following ingredients.  Go to the grocery store, steal ‘em from your neighbor’s house, whatevs.  I’m not here to judge:

  • 2-½ cups All-purpose Flour
  • 1-½ teaspoon Baking Soda
  • 1 teaspoon Salt
  • 1 cup Butter (at room temperature)
  • ¾ cups White Sugar
  • ¾ cups Packed Brown Sugar
  • 1 teaspoon Vanilla
  • ⅓ cups Milk (or Soy Milk, if you’re feeling funky)
  • 1 cup Mini Semi-sweet Chocolate Chips
  • 14 ounces (weight) Dark Chocolate Candy Coating
  • Waxed Paper and a Baking Sheet or two (this recipe makes about 70 truffles)
  • A few Toothpicks, or some other stabby device

Got everything?  Ok, let’s do this.

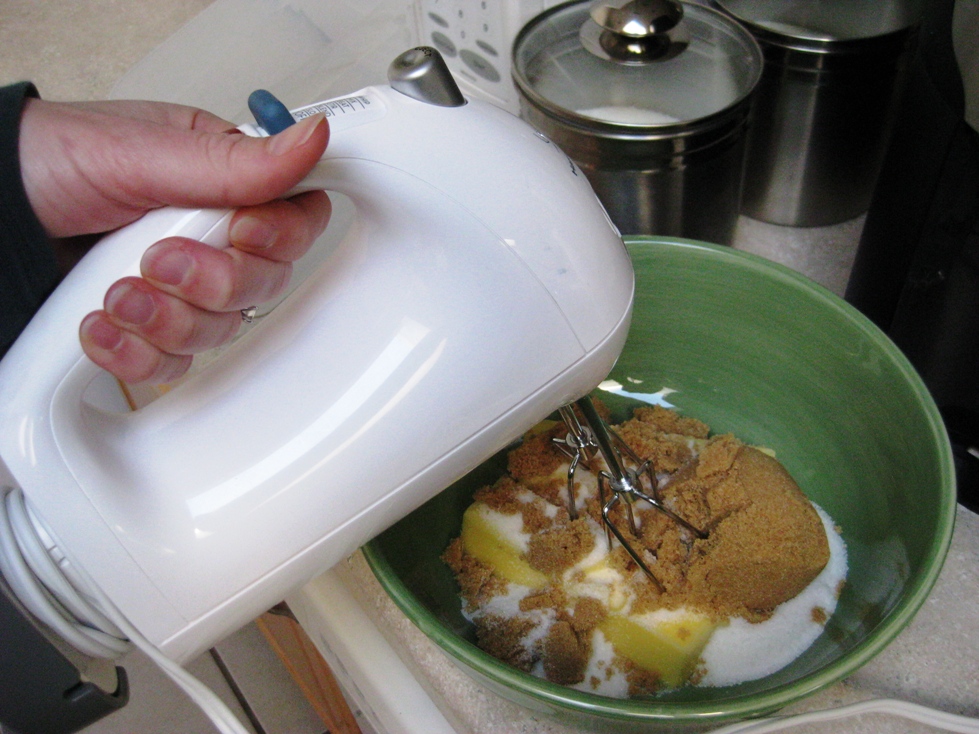
1. Dump your butter, sugar and brown sugar into a large bowl and mix with an electric mixer on low to medium speed until everything’s well blended.

It should look like this:

By the way, this is an egg-less recipe so feel free to eat all the dough you want while you’re making it.  Not that the threat of salmonella has ever stopped anyone before, amiright?

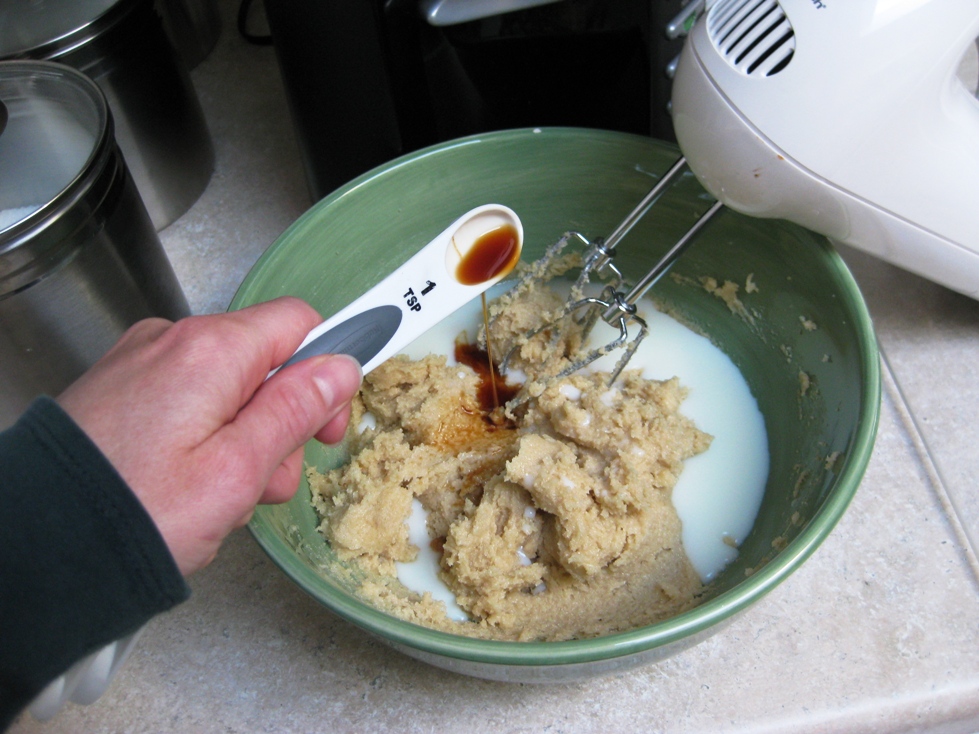
2. Add in the milk and vanilla.

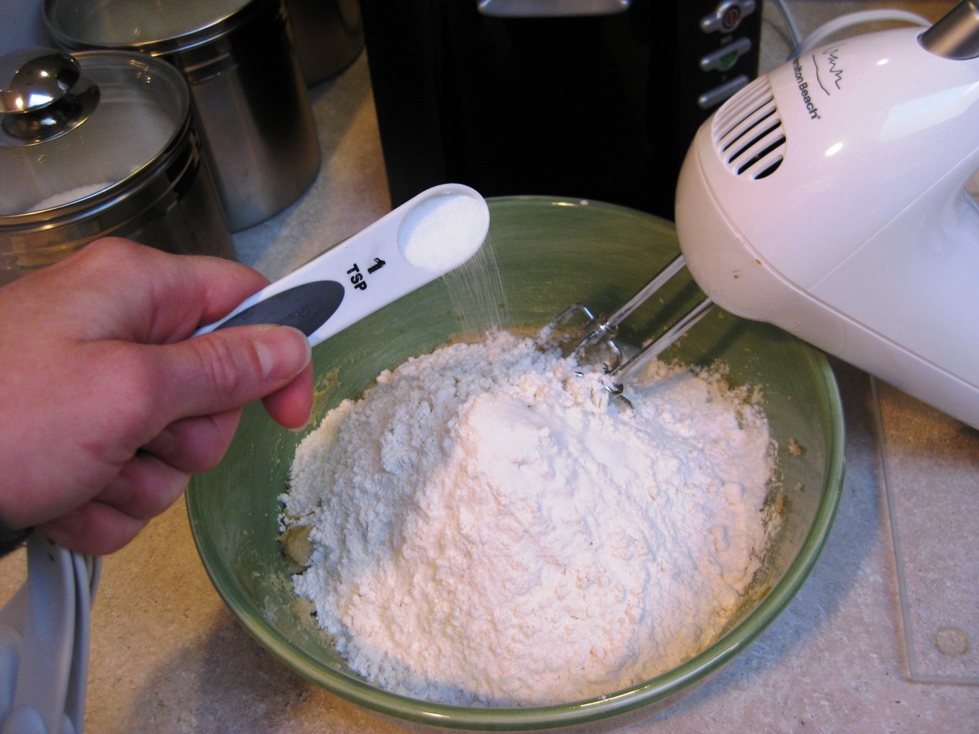
3. Then stir in the baking soda, flour and salt.

Expert Tip:  If your bag of flour still doesn’t open after the third attempt, feel free to go all Hulk Mania on it and accidentally punch a hole in the side of the bag.  It won’t help anything, but it’ll relieve some stress.

4. Put your bowl in the kitchen sink to contain the mess and mix all that nonsense on low speed until it looks like this:

I get to lick the beater now, right?

5.  Dump in the chocolate chips and spoon-stir until they’re well mixed.

6.  Here’s where you’re going to get a little ‘handsy’ (in a good baking way, not a creepy-stranger-on-the-bus kind of way).  Form one-inch balls of dough and place them on a baking sheet lined with waxed paper.   It may help to lightly coat your hands in flour before trying this.

7.  Now stick those suckers in the freezer for 30 minutes and take some time to contemplate the crazy world we live in where I’m doling out useful recipe advice.  Hah!  Insanity, right??

8.  Also during this downtime, gets to melting your Dark Chocolate Candy Coating according to the instructions on the package.  I used Log House Chocolate CandiQuick Coating, which just so happened to come in its own microwaveable tray.  Um, fewer dishes to wash?  Holla’!

9.  Once the chocolate is nice and gooey and thoroughly melted, resist the urge to plow face-first into it, pull your balls out (huh huh) of the freezer and get to dipping!  I used a toothpick because, well, I’m just fancy like that.  But you can use a fondue stick, fork or whatever sharp, stabby utensil works best for you.

**A Word of Caution:  If you’re anything like me, this part will get extremely messy so I recommend treating your kitchen like a murder scene.  Put a heavy-duty tarp down on the floor, cover everything on your counter in saran wrap and put on a shower cap.  Go naked if you must.  (Just don’t tell anyone you did until after they’ve already tried them.)**

10.  Dip each cookie dough ball  individually, tap the excess chocolate off, and return it to the lined baking sheet.

My balls started getting soft (huh huh) and unmanageable halfway through, so I just popped them back into the freezer for another 15 minutes and reheated the chocolate a bit.

11. Once they’re all done, put the tray in the fridge and chill them until the chocolate coating’s nice and firm.  Transfer them to an airtight container and store them in the fridge for up to one week.

And I shall call you “Breakfast”.

Voila!

Now go forth and make as many ball-dipping jokes as you can.

* By the way, I had a way nastier title for this post but it made even me blush so I decided to keep it to a clean Old Skool rap reference.

To all the impressionable children reading this blog:  You’re welcome.

And: Where the heck are your parents?

Turning Point

It’s about this time of year when my body starts convincing me I need to acquire an extra layer of fat to prevent me from freezing to death, so I’m inevitably compelled to eat lots of this:

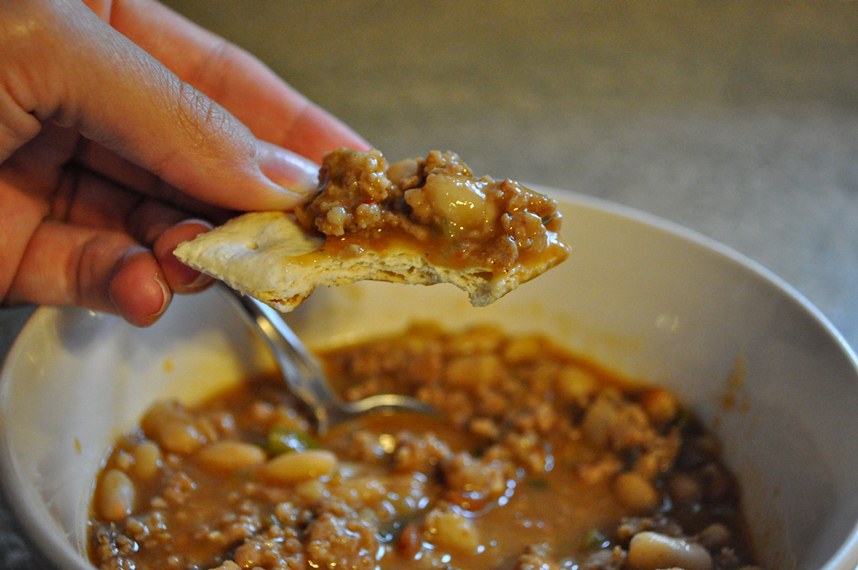
White Chili

And plenty of these:

Torti

And before long, I find I need to buy larger pairs of these:

Because sometimes this happens.

So yesterday, in a half-assed attempt to prevent nature from taking its course, I made this.

And ate it this morning like this:

Granola with yogurt and raspberries

And while it definitely wasn’t my usual piece toast smeared with perfectly proportioned layers of peanut butter and maple honey, I have to say it wasn’t bad.

Not bad at all.

Are YOU a Chili Racist?

I’m not gonna lie – Erin’s Halloween post from yesterday cracked me up.  I must say her Halloween looked far more entertaining than my night, during which I proceeded to drink an entire bottle of shiraz and pass out candy at my neighbor’s house because they actually decorated for the holiday and I felt it was far easier to mooch off of their hard work and holiday spirit than actually do any work of my own.  Don’t worry – I hid my wine glass behind the porch railing every time the impressionable little kiddies approached, but I may have laughed a little too loudly when my neighbor’s husband told a costumeless teenage boy he looked like Justin Bieber.

Yes, I was that girl.  I’m not proud.

Anyway, I think my lack of enthusiasm for yesterday’s holiday might stem from what it subconsciously implies – the cold is right around the corner.  When I came home from Costa Rica, I noticed the leaves had started turning colors.  I tried my best to ignore it.  When I had to pull the heavy quilt over myself in the middle of the night, I tried to ignore that too.  But the other night, when I felt compelled to make chili for dinner – chili, for godssake – I could ignore it no longer.  The Cold is here.

And since I don’t want to be alone in my misery, I’m going to share my white chili recipe with you – my AWARD-WINNING chili.

That’s right – this recipe won the coveted Golden Ladle at my office chili contest in 2009.  It even won a few votes in 2010, even though I wasn’t allowed to enter the contest as the reigning chili champ.  Now those of you who can’t get enough of traditional, spicy red chili might initially repel the idea of a relatively un-spicy white chili.

But I will tell you what I told the skeptics during my Golden Ladle acceptance speech:  Don’t be a chili racist – give white chili a chance!

I think I originally got this recipe from a grocery store, believe it or not.  I don’t tweak this much, so here’s what you’ll need:

White Chili Ingredients
  • 1 lb. sausage (I use Jimmy Dean’s hot sausage)
  • 1 lb. (give or take) ground turkey (the more you use, the thicker your chili will be.  You can use as little as 1/2 lb. and go as high as you want – I think I used just over a pound this time because I like my chili nice and thick)
  • 1 green bell pepper
  • 1 onion
  • 4-5 small stalks of celery
  • 1 Tbsp. roasted garlic (it’s actually really easy to roast garlic yourself, but I already had the jar of store-bought stuff and for the purposes of this chili, it works just as well)
  • 1 package of taco seasoning
  • 2 (15.8 oz) cans of great northern beans
  • 1 (14 oz) can of chicken broth
  • 1 (4.5 oz) can diced green chiles (the store was out of these, so I picked up 4 fresh green chiles and diced them myself – a little more work, but still tasty)
  • 1 (16 oz) can of refried beans with diced green chiles (This is the SECRET INGREDIENT, friends.  That’s right – it’s the thing that people love when they taste it but can’t quite figure out what it is.  Whatever you do, don’t skip this ingredient – it’s okay if you can’t find the kind with chiles – and DON’T tell them what it is!)

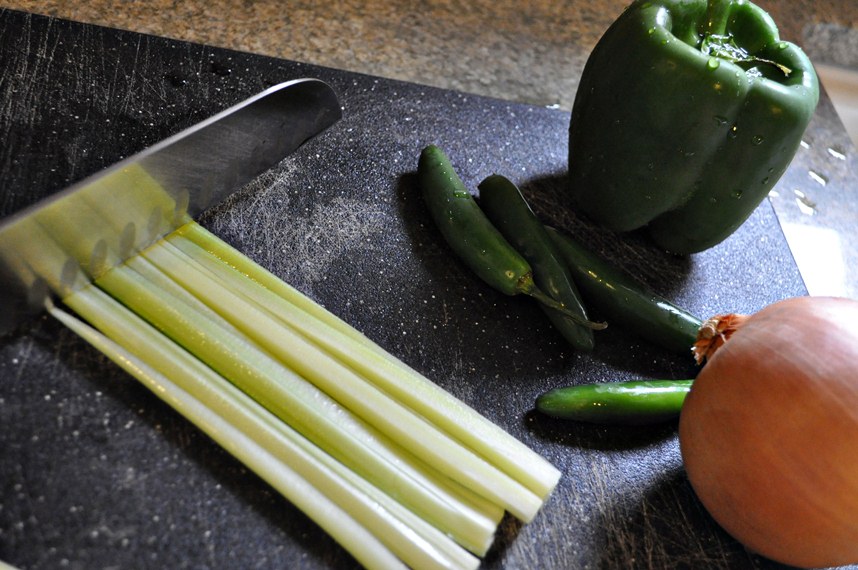
1.  Turn on your favorite satellite music station and dice up your celery, onion and bell pepper.  You should definitely sing while you’re doing this, but be careful about dancing – you are wielding a knife.

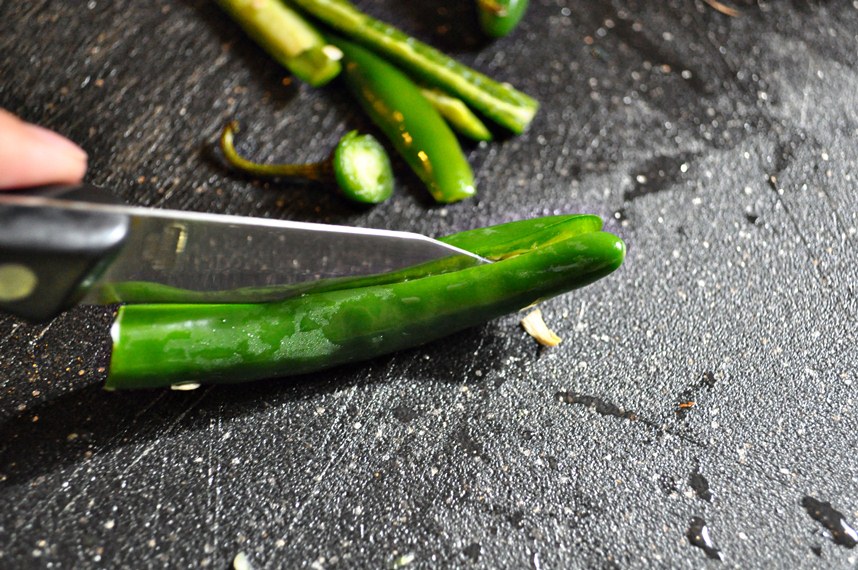
2.  If you bought fresh chiles, go ahead and dice those up as well.  Wear gloves if you’re smart, but if you’re me, forget the gloves and slice them into quarters lengthwise, slice off the seedy membrane part, and then chop up the rest.  That stinging sensation on your fingers will go away.  Eventually.

Everything’s ready!

3.  Warm up a pot over medium-high heat.  Add the sausage, turkey, onions, celery and green bell peppers.  If you’re using fresh chiles, add those too at this time.  Sauté everything for 10-12 minutes until the meat is fully cooked and the veggies are soft.

4.  Drain the excess grease, then stir in the taco seasoning.  Cover and let cook for about a minute, just to let all the tasty seasoning goodness soak into the meat.

5.  Remove cover and stir in the remaining ingredients (roasted garlic, northern beans (including liquid), refried beans, chicken broth, and the can of chiles if you didn’t use fresh).

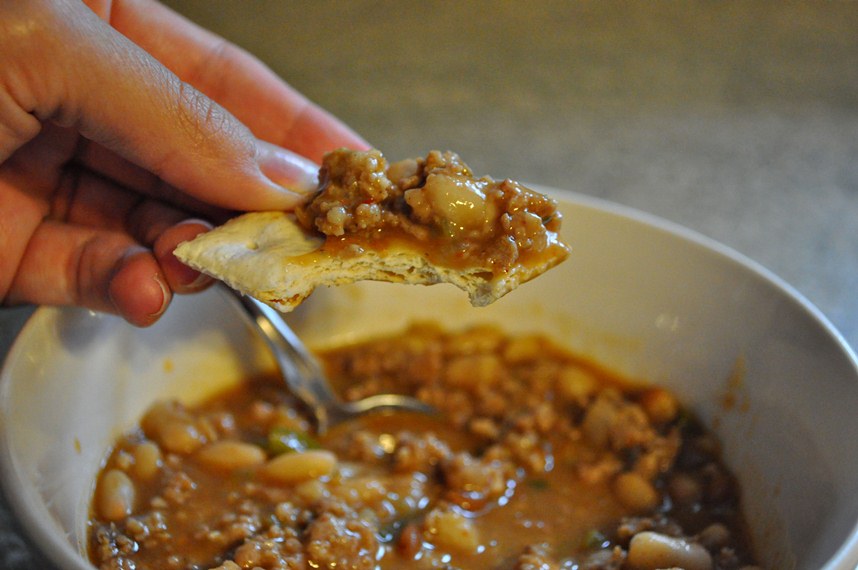
6.  Let sit on the stove, stirring occasionally, until everything is nice and warmed through.  Serve with your favorite hot sauce on the side and enjoy!