Navigate / search

You Only Want Me For My Tartlets

I was kind of extra word babbly yesterday,  huh?  Sorry about that.  I can’t promise it won’t happen again, because I’m pretty sure it will.  But today I’ll keep it simple, because I have approximately 671 things I want to get done before Saturday, most of which pertain to Alaina’s upcoming baby shower party, and others for my own personal sanity.

I promised to share with you the absolute best party appetizer of all time — the thing that guarantees instant popularity at any function for the person who brings them.  They’re not fancy, and most “foodies” would cringe at their unapologetic use of dried herbs and pre-made biscuit dough, but for some reason, people just can’t get enough of ’em.  It is for these tasty little bites that I overcome my fear of refrigerated, popping biscuit tubes time and time again.

The recipe is called Bacon Tomato Tartlets, but you just might want to call them Tartlets in case you’re around anyone who has a fear of tomatoes or bacon.  Plus, “tartlets” is just fun to say.  Justin hates tomatoes, yet he would gobble up a whole batch of these if I let him.  And if you don’t like bacon, then I think you might have problems.

My fantastic neighbor gave me this recipe, and she got it from her fantastic friend, and I’m not sure where it originated before that.  I posted the recipe here on Tasty Kitchen, so go give me my first review if you make them!

But only if you think they’re good.

To make them, you will need:

  • 1 (12 oz.) can refrigerated, flaky biscuit dough (This HAS to be the flaky stuff.  You’ll see why in a sec.)
  • 6 strips of bacon, cooked and crumbled
  • 1 medium tomato, seeded and diced
  • 3 oz. Mozzarella cheese, shredded (I probably use more like 5 oz. when I’m guesstimating.)
  • 1/2 c. Hellmann’s Real Mayonnaise (I’m pretty sure this has to be Hellmann’s.  Don’t argue with me about this, and don’t you dare use that crap they call Miracle Whip.  The only miracle is that it doesn’t make me vomit.  You have been warned.)
  • 1 tsp. dried basil
  • 1 tsp. dried thyme
  • 1/2 tsp. dried oregano
  • 3/4 tsp. garlic salt

You can see I used 2 Roma tomatoes this time in lieu of 1 medium tomato.  Just go with what you have — the ingredients don’t need to be exact.

1)  Cook your bacon on the stove until crispy.  Even if you normally like chewy bacon, you have to remember that this isn’t about you right now — it’s about the tartlets.  And the tartlets need it crispy.  Just lay the bacon in a cool skillet (I love to use my cast iron grill pan), turn the heat to medium-high, and let it cook in its own grease for a bit.  When the bottom turns brown, flip and do the same to the other side.

mmm… bacon.

Once it’s cooked, crumble it up on a paper towel to soak up the grease.

2)  Mix all of the ingredients (except the biscuit dough) together in a bowl.

*TIP:  At this point you can cover and refrigerate the mixture for a day or two before preparing the tartlets if you don’t want to make everything the day you need them.

3)  Remove the biscuit dough from the refrigerator (this step is easier to do if the dough is cold), try not to jump out of your panties when you pop the tube open, and separate each biscuit into 3 layers.  This is why they need to be the flaky kind.

See how they separate naturally?

Spray a mini muffin tin with non-stick spray and use each 1/3 biscuit to line each muffin cup.  There will be enough for exactly 24 mini tarts.  Aka tartlets.  Why is that word so fun??
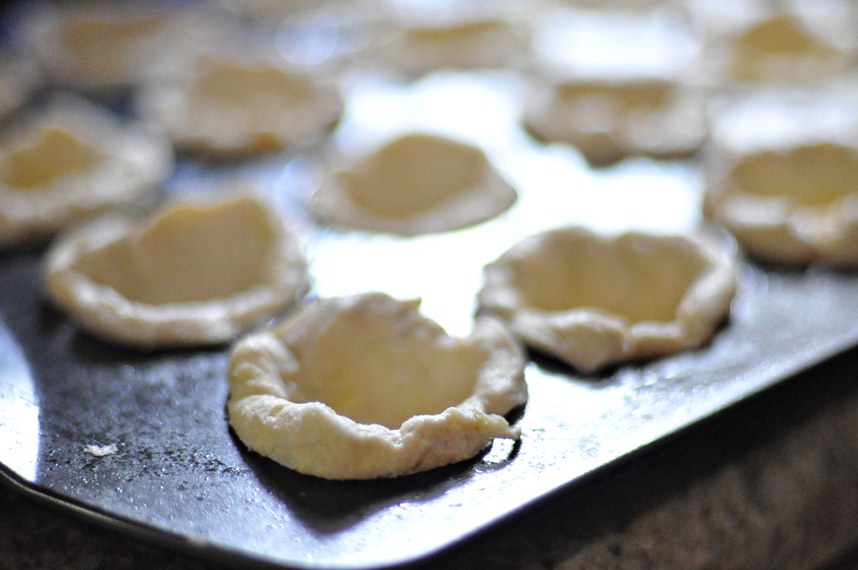
4)   Fill each biscuit cup with your filling mixture and bake at 350-degrees F for 10-12 minutes until the biscuits are lightly browned.

Some might poof up more than others, but it’s very likely no one will notice since they’ll be gone in approximately 4.8 seconds.

And everyone will be like, Where did that extremely popular person go who made those delicious tartlets?  I think those were like… the best tartlets I ever tasted in my life.  Go tartlets!  Tartlets.  Tartlets.  Tartlets.  Why is that word so awesome?

And you can just sit back and bask in the glory.

Just try not to eat them all before you leave the house.

…And then You Let the Flavors do a Happy Dance on your Tongue

I was going to lay out the office plans for you today (or lack thereof), so you could help me figure out what I should do in there.

Unfortunately, I can’t seem to find the tape measure to draft a detailed scale drawing on graph paper (did I ever mention that I used to want to be an architect?), and a detailed drawing — to scale — is pretty much the only way I know how to do things.

If I don’t do it perfectly and to scale, accidents will happen.  Mistakes will be made.  Heads will roll, and the universe might implode.  And I’m pretty sure I don’t want that on my back.  So if the world really does end in 2012, it’s probably my fault because I still couldn’t find the tape measure.

So instead of all that, because I’m versatile, flexible, and easily adapt to obstacles (in case any potential employers are reading this), I’m going to share with you the most fantastically awesome recipe for hummus in the history of the universe.

What?  You don’t like hummus?  Hummus is only for hippies and Democrats?

Well that’s where you’re wrong, my friends.  This is an extra special spicy, smoky, chipotle hummus, and I dare you to not like it.  I tested some on Justin, who would normally prefer a more typical chip dip — you know, something less healthy — and he gobbled it up.  The flavors are a perfect meld of smoky chipotle and cumin combined with sweet sun-dried tomatoes and roasted red peppers. There’s just a hint of a spicy kick, which is perfect for me, but you could always add an extra chipotle pepper (or two) if you prefer more of a punch.

I’m keeping this on my personal list of simple food ideas to bring to a party that people will love and ask me for the recipe and ultimately fulfill my constant need for approval.

The original recipe is here, and I didn’t change it a bit.

To make it (and trust me, you should), you will need:

  • 2 (15.5 oz.) cans of garbanzo beans, also known as chickpeas, drained (I read that you could soak these in water and rub off the husks for a smoother hummus, but that sounds like an awful lot of work to me for the same flavor in the end.)
  • 1/2 cup water
  • 1/4 cup tahini (I know this sounds fancy, but it’s just a sesame seed paste — kind of like peanut butter — that makes hummus… hummus.  I can find it at my po-dunk grocery store, so I don’t think you’ll have any problems.)
  • 1/4 cup lemon juice
  • 2 tablespoons olive oil
  • 1 chipotle pepper in adobo sauce (You can find small cans of these in the Hispanic section of a regular grocery store.  You just use ONE pepper from the can for this recipe, unless you like things extra spicy.)
  • 2 cloves garlic
  • 1 1/2 teaspoons cumin
  • 1 (7 oz.) jar roasted red peppers, drained
  • 6 oil-packed sun-dried tomatoes, drained
  • 1/2 cup cilantro, chopped
  • 1/2 teaspoon salt
  • Ground black pepper to taste

Whew!  I know that’s a lot, but all you basically do is throw everything in a food processor and blend, so it’s about as easy as it gets.  (Except in my case I don’t have a food processor, so I use my totally awesome hand blender… more on that in a hot second.)

Up front in the small plastic container is the chipotle peppers in adobo sauce.  I’d already opened the can to use a pepper for another recipe, hence the lack of original packaging.

1)  The original directions say to blend the first 8 ingredients, then add the sun-dried tomatoes, roasted red peppers, and cilantro and just coarsely blend so your hummus has chunks, but I blended everything completely because a) My hand blender doesn’t really give me a choice in the matter, and b) I prefer it that way.

Don’t get discouraged if you open your tahini and it has separated into a hard, pasty substance at the bottom and an oily substance at the top.  That’s perfectly normal.  Do your best to stir it together, and if all else fails, just fill your measuring cup with a little of the paste and a little of the oil.  It will come together when you blend the hummus.

So I threw the first 8 ingredients in a bowl, and used my super nifty immersion blender (aka. hand blender) to chop everything up:

Should I be worried that all of my pictures lately are insanely blurry and I don’t seem to notice until I transfer them to the computer?

Public Service Announcement:  If you don’t have one of these immersion blenders, you should probably get one.  They’re perfect for things like this or soup, where you want to blend a bunch of stuff together without actually transferring the ingredients from the bowl or the pot.  And your dishware stays protected because the blade is surrounded by metal (or in some cases plastic).

I’m glad I opted for this stainless steel Cuisinart Smart Stick (keep those dirty jokes to yourselves), because I don’t need to worry about any plastic melting if I use this in hot soup.

The hummus actually tasted pretty good at this point and I could’ve stopped there.  But I’m glad I didn’t.  I added the rest and then blended again.

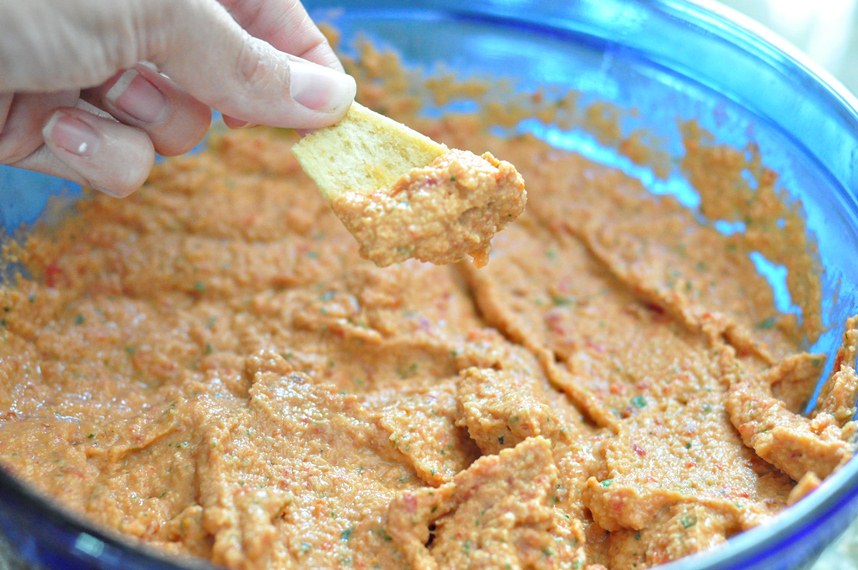
It looks pretty when it’s done.  A red-ish hummus with flecks of green cilantro.

And it tastes like a party.

I like to eat it with pita chips, but it would work with veggies too, if you want to get extra healthy.

I think you should make it to celebrate the birth of our country this weekend.

I realize I probably should have transferred this to a pretty bowl for the final photo shoot, but I was kind of too busy eating it to care.

Just so you know, it’s perfectly acceptable to eat this for lunch 5 days in a row.

I hope.

My Big, Fat, (except not fat because it’s kind of skinny) Greek Pasta

I have been craving pasta lately.  Like, when I rack my brain for dinner ideas, all I can think about is pasta.  Long noodles, stubby noodles, twisty noodles… it doesn’t matter.  Red sauce, white wine, tomato cream, butter, oil… whatever, I’m game.

The good news is that making pasta allows me to clean other, long-forgotten items from the nooks and crannies of my pantry, like half-used boxes of bowtie pasta, dusty bottles of artichoke hearts and cans of tomato paste, and nearly empty tubes of breadcrumbs.  (I confessed on Facebook the other day that I actually threw out a box of breadcrumbs that expired in October, 2008.  No joke.  Lucky for me, my friends had awesome senses of humor in their responses, and I still had another open box for my pasta.)

The bad news is that pasta, especially if it’s exceptionally tasty pasta, isn’t exactly the healthiest of meals.  And considering I gained about 5 pounds in Spain, I’m thinking this insatiable pasta craving upon our return must be some cruel, cruel joke.

That, or it’s God’s way of telling me we should’ve tacked on a trip to Italy right after Spain.

Either way, it’s messed up.

So last night I tried to find a way to make the pasta a wee bit healthier, by avoiding things like cream, excessive amounts of butter, cream, and cream.

Of course I had to use some butter, but that’s just responsible cooking.  The recipe is for a Greek flavor-inspired pasta dish, and it’s a combination of various recipes I found on Allrecipes.com as well as using a couple of things I had on-hand and tossing ’em in.  The result?  I thought it was pretty phenomenal.  However, I’ll be honest and say that Justin wasn’t quite as enthused, but he a) doesn’t care for tomatoes, and b) still said, “It’s pretty good — you know — for something healthy.”

I think he missed the cream.

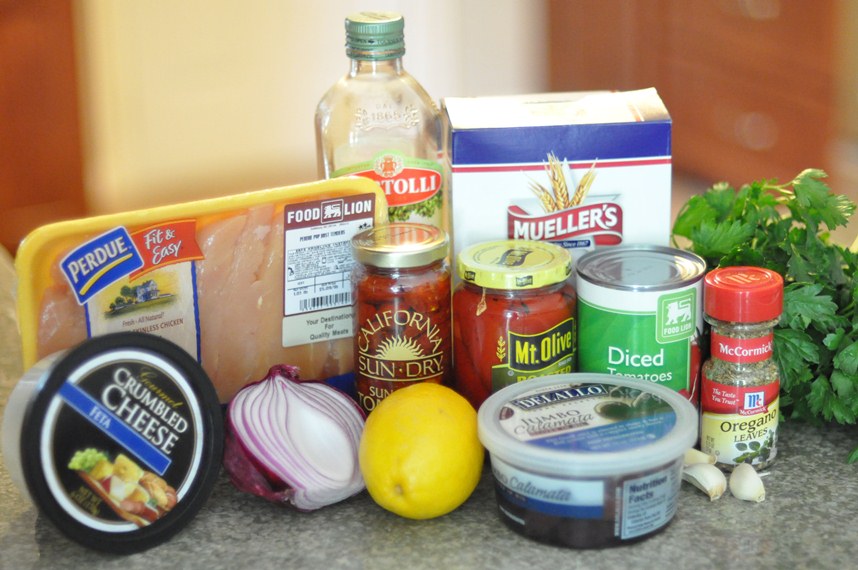
This comfortably feeds 2 people with plenty of leftovers.  To make it, you will need:

  • 8 oz. pasta (Whatever you want — I used bowtie because I had half a box left, but it’d be great with some type of spiral pasta or penne.)
  • 1 tablespoon olive oil
  • 1 tablespoon butter
  • 1/2 chopped red onion
  • 3 cloves garlic, minced
  • 1/2 – 1 lb. boneless, skinless chicken breast (I used 1/2 lb.)
  • Splash of white wine
  • 1 small jar artichoke hearts, marinated in oil and chopped (Next time I would use 2 jars. You could use the cans of hearts in water, but I think they have more flavor this way.  And sometimes, you just don’t substitute health for flavor.)
  • 1/2 can diced tomatoes (You could also use a fresh tomato, but again, I was trying to use up stuff in my pantry. If you love tomatoes, go ahead and throw in the whole can. Also, I used about half the water in the can and drained the rest.)
  • 1/4 cup crumbled feta cheese (Could stand to add a bit more, but I was trying to keep this lighter. The feta melts and gives the dish a really delicious, subtle flavor. It’s not as “bitey” as unmelted feta.)
  • ~15 Kalamata olives, chopped and seeds removed (Optional — I had been snacking on these earlier and decided to add them to the pasta. If you use them, go easy on adding any additional salt to the dish because these are salty enough!)
  • 3 tablespoons fresh parsley, chopped
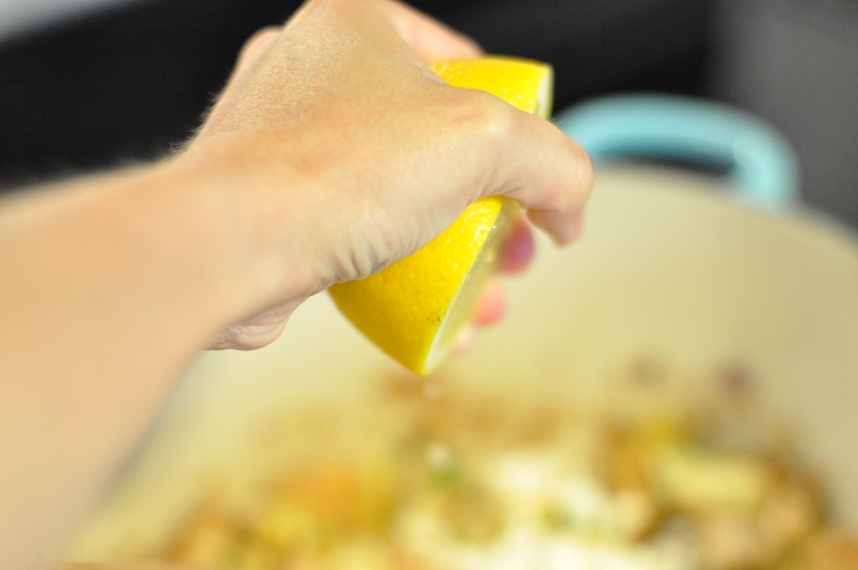
  • Juice from 1/2 a lemon
  • 2 teaspoons dried oregano
  • Salt and pepper to taste

Whew.  That looks like a lot of ingredients.  But I promise you, it’s just a matter of chopping a few things and throwing ’em all in a pot.  I tried to take a family portrait, but, as usual, I missed a few members and actually have a couple of extras in there.  (Ignore the jars of roasted red peppers and sundried tomatoes — I bought those yesterday for another recipe, then forgot what I bought them for, and they somehow ended up in this picture.  Oops.)

Okay, so pretend that there’s wine, butter and artichoke hearts in this photo, and that there’s NOT a jar of roasted red peppers and a jar of sundried tomatoes.  Thank you.

Oh, and every single photo in this post is blurry because I had the aperture set too wide.  Or maybe I had the shakes.  You know, because I hadn’t had my pasta yet.

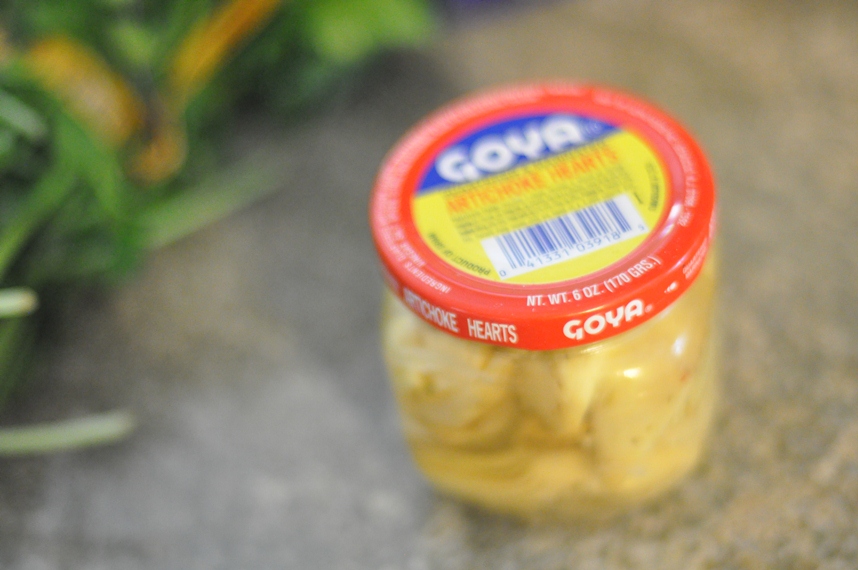
Here’s the jar of artichoke hearts.  Cheeky bugger.

1.  Get a large pot of salted water boiling on the stove, and cook your 8 oz. of pasta according to the package directions.

2.  While the pasta is cooking, chop up your onion and garlic.  Melt your butter and heat the olive oil over medium-high heat, and toss in the garlic and onion for around 2 minutes.

Melt butter and heat oil.

Let red onion and garlic cook for around 2 minutes.

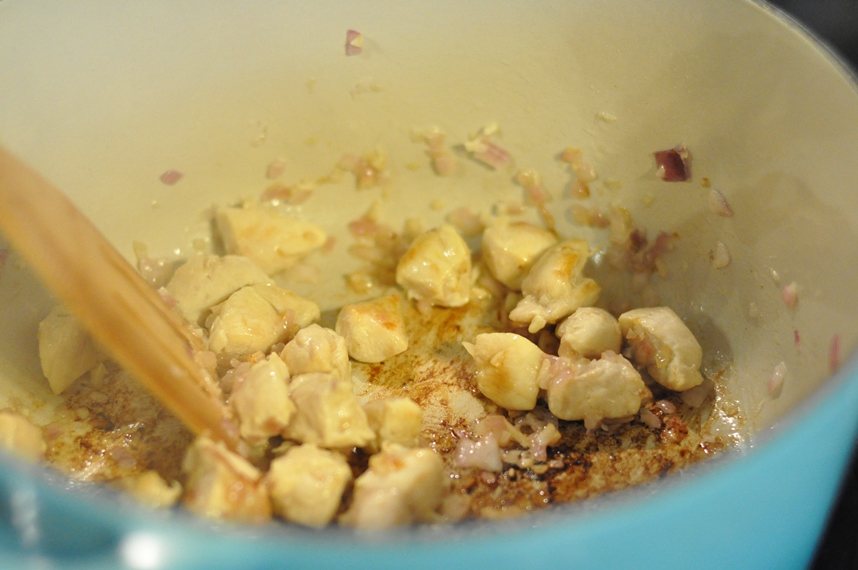
3.  Chop your chicken into bite-sized pieces and toss that into the pan.  Let the chicken cook for 5-6 minutes, until it’s no longer pink and the juices run clear.

Cookin’ chicken.

4.  Now.  At this point, I felt like the pan could use a little deglazing, which is fancy cooking speech for using some kind of liquid to get all the brown crusties off the bottom of the pan.

See the crusties?

So I took my glass of wine and poured some in.

Which is actually kind of difficult to do.  If you try this, I’d go straight from the bottle.  And I probably wouldn’t try to take a picture at the same time.  Because it might look something like this:

The picture is awful, but the wine did the trick.

See?

5.  Then throw in everything else: chopped artichoke hearts, feta cheese, diced tomatoes, Kalamata olives, chopped parsley, dried oregano, lemon juice, and salt and pepper to taste.

Remember, if you’re using the olives, go easy on the salt!

Stir it all around until the cheese melts completely.  Then throw in your cooked and drained pasta.  If it seems kind of dry, add some of the liquids from your can of diced tomatoes.  If you’re using fresh tomatoes, add more lemon juice.  Or wine.  Or water from the pasta.  Whatever your little heart desires.

But, it’s important to note that this isn’t a particularly saucy pasta recipe.  There should be a light coating of moisture on your pasta, but no excess sauce, per se.

I don’t want to say this is a girly pasta, but yeah.  It’s kind of girly.  I suppose because it’s not… hearty?  It’s fresh.  It tastes light.  It goes excellent with a glass of white wine.

And if manly men know what’s good for them, they’ll like it too.

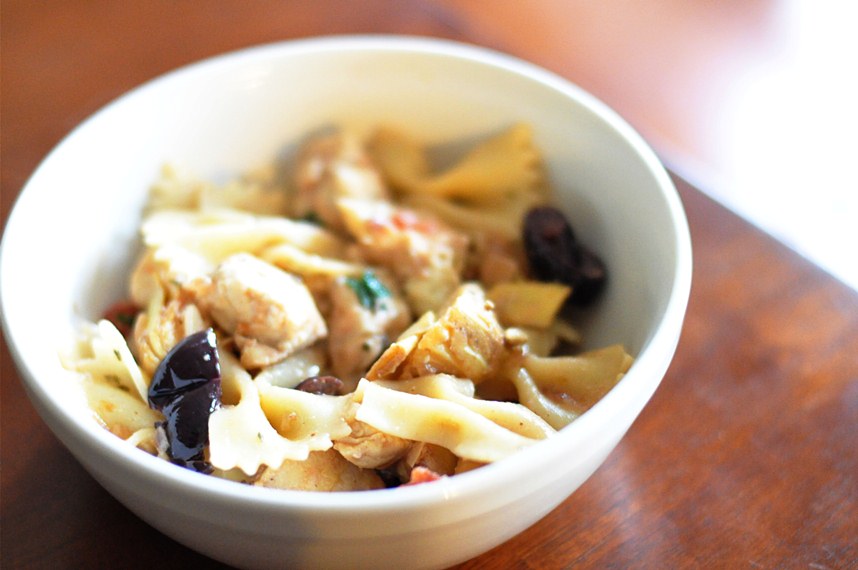
Every bite is like a different medley of flavors.  In some, you taste the rich feta.  In others, the tangy artichoke.  Sometimes salty olives.  Sometimes savory chicken.

It’s pretty much fantastic because it doesn’t get boring.  And, you know, it’s not bad… for something healthy. ish.

Leggo My Sausagy Breakfast Casserole Stuff

So.  In case you didn’t notice, I have a fantastic giveaway going on right here.  And let me just say this:  Many, many more people viewed the giveaway than entered, and I’m thinking either 1) This giveaway is not lame – it’s just that only certain people are cool enough to want it; or 2) You couldn’t figure out how to leave a comment or were scared to leave one because you thought I might judge you for your choice of wine.

All I can say is, 1) Be cool.  Enter the contest; 2) Click on the number of comments at the bottom of the post to leave a comment from the main page or just scroll down to the bottom of the comments and type something in the “leave a reply” box; 3) While I don’t believe all wines are created equal, I do believe that there are people in the world who aren’t going to think exactly the way I think or like the exact things I like.  Rest assured I’m the last person to judge.  I think we established that here.

Now that the boring business stuff is out of the way, I noticed that I’ve been getting some new readers lately who’ve been leaving really, really nice comments.  I’m not sure where you’re coming from, but thank you.  Also, I’m super amazed when some of you who’ve been reading this for a while now mention something I posted 6 months to a year ago.  I mean — I don’t even remember what I posted this week, let alone last year, so thank you for continuing to not only read my public account of my successes and failures, but for actually remembering it.

On second thought, feel free to forget about my failures.  Who wants to remember those?

If there’s anything at which I fail on a regular basis, it’s cooking.  That’s a big reason I like to share recipes on this site — to catalog those occasions when it actually works out — if not exactly according to plan, at least it’s still edible.

It’s been a while since I posted a recipe, and since we had a bit of company last weekend, I thought I’d share an old favorite that I use almost every time we have house guests:  The Breakfast Sausage Casserole.

For those of you who are new and don’t understand why a self-proclaimed domestiphobe is getting all Betty Crocker on you, the short answer is that I’m a learner.  I like to evolve.  If I’m bad at something but I enjoy it anyway, I make the effort to get better.  So if you’re scared of cooking but want to learn, there’s no better way than to just dive right in.  Accept the fact that mistakes will be made, and we’ll all get along just fine.

(And trust me — sometimes there’s nothing more therapeutic than chopping up an onion and throwing it into a simmering pan of butter — especially if you have a particularly vivid imagination and can picture the onion as a crazy ex boss or that horrible guy (or girl) who broke your heart for no reason back in college.  This is all figurative, of course.)

And if you’re not afraid of cooking and are already pretty excellent at it and consistently pronounce the word prosciutto with an accurate Italian accent, you might just want to go ahead and skip this post entirely.

So.  Breakfast casserole.  This is a classic recipe that everyone should keep in their arsenal for low-maintenance house guests because it’s relatively inexpensive, it feeds a lot of people, and the leftovers are fantastic.  Plus, you make it the night before, so all your hungover self has to do in the morning is preheat the oven and pop it in.

There are many variations of this dish — I know Justin’s mom has at least 2 different and delicious recipes she makes when we visit — but this one is my favorite because I got it from my grandmother.

To make it, you will need:

  • 2 lb. Sausage (As usual, I use Jimmy Dean’s sausage. For this one, I use one hot and one regular. I make too many things with sausage.  I think I have a problem.)
  • 3 cups of seasoned croutons (any brand will do)
  • 2 cups of shredded cheese (any kind – cheddar, marbled… I think this time I used a brick of blended Monterrey Jack and cheddar. You can buy the bags of pre-shredded stuff, but I think it tastes better when you grate your own.)
  • 6 eggs
  • 2 1/2 cups milk
  • 1 can cream of mushroom soup
  • 1 tsp. dried mustard
  • 1 small can mushrooms, drained (optional) (This would also be great with some fresh sautéed mushrooms.)

I apologize for the lack of step-by-step photos in this post.  I may have been a glass of wine into making this and distracted because our guest had already arrived.

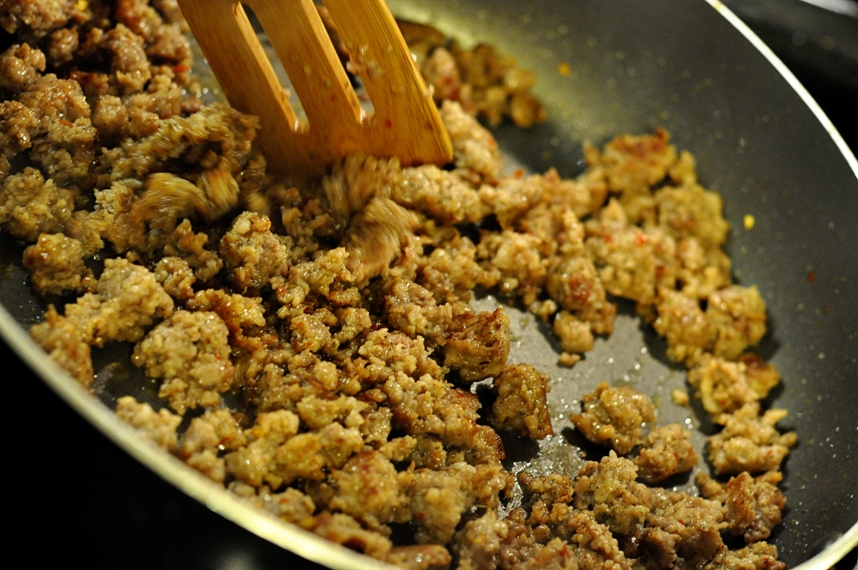
1)  Heat a large pan over medium-high heat.  Add the sausage, break it up and heat until it’s fully cooked (no longer pink).

[Imagine there’s a picture of sausage cooking on the stove here.  I’m sure I have one somewhere from the other 8-bagillion sausage recipes I have here, but I’m too lazy to look.]

2)  While the sausage is cooking, grease a 9×13″ pan and layer the croutons on the bottom.  These will eventually become a soft crust for the casserole.

3)  Sprinkle the 2 cups of cheese over the croutons.

4)  When the sausage is finished cooking, drain the grease (or use a slotted spoon) and layer the sausage over the cheese.

Note:  This is a pretty basic and hard-to-screw-up recipe, but I will have you know that the layering is important.  If you mess up the order, you could end up with croutons floating at the top, and that just doesn’t make sense.  I might have learned this from experience.

5)  In a large bowl, beat the 6 eggs with a fork.  Stir in the teaspoon of dried mustard, 2 1/2 cups of milk, and can of cream of mushroom soup.

Pour this mixture over the top of the sausage.

It will be lumpy and perfect.

Now’s also the time to add the canned mushrooms if you’re using them.  This time, I did not.

6)  Cover and let it sit in your fridge overnight.  This is when the croutons will soak up all that milky, eggy goodness to form a nice, soft crust once baked.

7)  Set your alarm for a couple of hours before you want to eat.  Drag your bedraggled self to the kitchen and preheat your oven to 300-degrees Fahrenheit.  Nap on the couch until the oven is preheated.  When the oven is preheated, stick in the casserole and go back to bed for 1 1/2 hours.

Or, if you’re smart, make coffee — lots of coffee — and wait for the casserole.  Because if you have a crappy oven like mine, the casserole might get a little… crisp.

But the amazing thing is that it’s still SO good!

This holds together a lot better if you actually let it cool a bit before devouring.

It’s not fancy.  There’s no prosciutto.  It uses canned soup, for crying out loud.

But it reminds me of a Sunday morning at grandma’s.  Before life got all… hard.

And that, my friends, is worth every, delicious, sausagy bite.

Turns Out Turkey is Good for More than Just Thanksgiving…

I’m not gonna lie.

Those of you who know me and/or have been reading the blog for a good while (so you pretty much know me too), know that I like me some red meat.

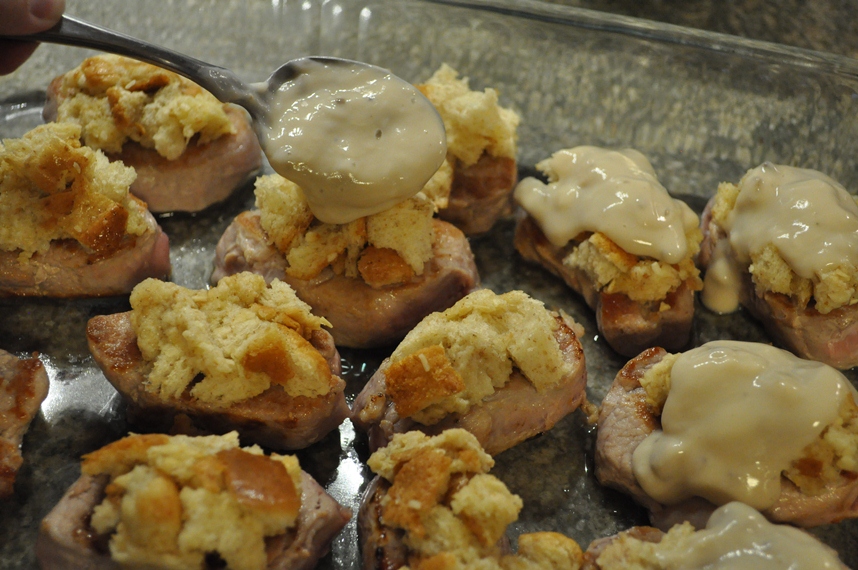
Delicious baked pork loin topped with stuffing?

Yes, please.

Anything with sausage?

Don’t think you could stop me.

Grilled ranch beef burgers stuffed with fresh mozzarella cheese?

Bet I can fit a whole one in my mouth.

Just kidding.

Mostly.

Pan fried steak sandwich with caramelized onions?

Steak Sandwich

I’m pretty sure I just jizzed in my pants.

Anyway.

Red meat most certainly doesn’t have to be a part of every main meal – in fact, meat in general doesn’t have to be a part of every main meal – but I do like it.  I don’t think I could ever voluntarily give it up entirely.

However, in the name of health, I occasionally substitute red meat – especially hamburger – for a leaner poultry like ground turkey or chicken.  Especially if it’s a meal that’s heavily seasoned with taco seasoning or a medley of ingredients like these Taco Rice Bowls of Deliciousness, I find I can get away with a non-beef substitute.

But turkey burgers?

No, thanks.

Every time I tried them, they turned out dry and tasteless.  SO not like a regular beef burger with a lovely pink center and juices that soak into the lightly toasted bun…

*Hang on, I need to wipe the drool off my keyboard.*

Until now, that is.

Friends, meet the Spinach Feta Turkey Burger.  I found the recipe on Eat, Live, Run, where Jenna, an extremely talented chef and recipe creator, shares her amazing food.

And I will tell you – these burgers really are ah-maz-ing.

I’m seriously so glad I decided to try them.

And they really only took about 20 minutes to make.

Here’s what you need:

  • 1 lb. ground turkey (I used 1.25, since that’s what came in the package)
  • 1 egg, lightly beaten
  • 5 oz. frozen spinach, defrosted (I used almost the whole box since I had more meat. This recipe is very forgiving.  I simply microwaved the spinach for a couple minutes after cutting a ventilation slit in the bag, and then squeezed out as much of the water as I could.)
  • 3/4 cups crumbled feta cheese (I used a whole cup)
  • 1 tsp. salt
  • 1/4 tsp. pepper
  • Buns (I toasted mine with butter on a griddle)
  • Garnish (All I used was a bit of mayo mixed with fresh basil and lemon juice, which is what I made as a dip for the sweet potato fries we had on the side.  Turns out it worked pretty well on the burgers!)
1.  Mix your ingredients together in a bowl.

2.  Use your hands to form the mixture into patties (I made 5 patties with 1.25 lbs of turkey). Heat a couple of tablespoons of olive oil in a pan over medium heat, and cook the burgers for 6-8 minutes per side until the meat is cooked through (no longer pink).

*Make sure you don’t have your heat set too high.  Unlike beef burgers, turkey burgers need to be thoroughly cooked all the way through.  If the heat is too high, you’ll burn the outside of the burgers before the inside is fully cooked.  It might help to make them a little flatter than I made mine, but hey – I like to live on the edge.

That’s IT!

Stick ’em on a bun, and they’re ready to eat.  They’re absolutely delicious.

In fact, I might have to make one for myself tonight.

As usual, my photos of the finished product are awful.  I’m not sure what I’m doing wrong.  Part of the problem is I ran out of decent light.  And I was in a hurry because I really wanted to eat my burger.  Is that a crime?

Didn’t think so.

Definitely check out Jenna’s fantastic site for even more enticing pictures.  And thanks, Jenna, for finally convincing me that turkey actually CAN make a delicious burger.

I’m Pretty Sure You Don’t Have to be Jewish to Make This.

Story time.

I used to sublet 1 bedroom of a 2-bedroom apartment for $200 a month from a young couple and their 2 cats.  Yes, I considered the cats landlords too, since they had more control over the main living areas than me.

The girl who lived there also happened to be one of my good friends from back in high school and was, during the time I lived with her, also my boss where I fixed and sold watches (one of the best jobs ever).

*One of these days I will throw together a timeline of my youth for you, since it’s all very confusing.

I’m still not sure what happened.

Anyway.

One night I came home from work and my old high school friend/landlord/boss was out somewhere, but her boyfriend (with whom I also got along splendidly) was home entertaining some male friends.  You know, sitting around, drinkin’ beers, watchin’ sports.

That sort of thing.

Katie!” he yelled, when I came in the door.  “You have to try this salsa.  It’s awesome!”

Since I felt famished from the long day of cleaning dirt, wiry hairs and a wax-like substance I still can’t identify out of the stretch bands of old mens’ watches, salsa sounded like just the thing I needed.  A cool, refreshing, chunky bite of salsa.  I took a huge scoop on a tortilla chip and shoved the whole thing in my mouth.

I didn’t notice the anticipatory stares of the guys in the room.

I didn’t notice the exchanged looks and the sly grins.

All I could focus on was the enticing salsa, the salty chip, maybe following it up with a swig of cold beer, and Oh my GOD it tastes like burning!!!

It turns out that the jar of “salsa” was really a mixture of various chopped chile peppers and spices that could only have been concocted by the Devil himself.

I don’t really feel as though I’m exaggerating on this.

Prior to the incident that will henceforth be known as the Time I Was Tricked Into Swallowing Salsa That Wasn’t Really Salsa But Satan’s Fury Preserved In A Jar, I was fairly ambivalent towards spicy foods.  They sounded exotic and exciting, but I hadn’t really grown up with them and never really gave myself the opportunity for experimentation.

But after the Time I Was Tricked Into Swallowing Salsa That Wasn’t Really Salsa But Satan’s Fury Preserved In A Jar, I pretty much decided that spicy foods were no fun at all and why would you want to eat something that physically hurts?

About 8 years later, I found myself not only working on a chile pepper farm in Costa Rica that grows some of the hottest peppers known to man, but I was also making hot sauce.

Chile Pepper Farm.  That is not me in the photo.

Blending Chile Town Hot Sauce

Hot sauce making is dangerous work.

It was from this experience that I started to lose some of my previous misconceptions about adding heat to food.  And although my tolerance is still fairly low, I find myself trying new recipes that require some spice.

Enter the Southwest Chipotle Brisket Tacos I made the other day.

The original recipe can be found here.

I was terrified the spice in these would be too much for me and I would end up wasting a perfectly beautiful (and not inexpensive) cut of meat, but the result was a very nicely seasoned, tender brisket with a slight kick.  The good news is that if you like <i>more</i> kick, you could easily add hotter spices to the pot, or you could garnish the tacos with your favorite flavor of hot sauce.

(By the way, if you’re dying to try the sauce I talk about so much, it’s not available yet in the U.S.  But, you can become a fan on Facebook and they have trivia every Tuesday and you could win yourself a bottle!  I realize this sounds like an infomercial, but I really do love the stuff.)

There are quite a few ingredients in this, but aside from browning the outside of the brisket before you start the slow cooking process, the only real step is throwing everything in the crock pot and turning it on.

Not too shabby,  huh?

To make this, you will need:

  • 3 lb. beef brisket (mine was more like 4 1/2 lbs, but I didn’t need to adjust the amounts of everything else)
  • Salt and pepper
  • 4 Tbsp vegetable oil
  • 5 cloves garlic, chopped
  • 2 yellow onions, thinly sliced
  • 2 Tbsp chili powder (If you like these spicy, you can use the extra hot Mexican style chili powder)
  • 1 Tbsp red pepper flakes
  • 1 Tbsp paprika
  • 2 tsp ground cumin
  • 1/4 cup apple cider vinegar
  • 1/2 cup water
  • 1 28 oz can diced tomatoes (and the liquids)
  • 2 chipotles in adobo (These come in a small can in the Hispanic section of my grocery store.  Gaby says you can freeze the rest for other recipes, but if you like things extra spicy, throw in a few more.)
  • 1/4 cup molasses

This is a horrible family photo.  It was early in the morning and I couldn’t get everyone to stand still, hence the blur.  The water kept wandering out of the shot, the paprika was camera-shy, I’m pretty sure the onions are having marital problems, and I chopped off the top of the veggie oil’s head.  We just weren’t having a good morning.

This is the brisket.  She was a little… ahem… hefty to fit in the family photo, so we gave her an individual shot.  As you can see, this one came pre-packaged, but if you’re lucky enough to live somewhere with a butcher shop (where the employees don’t smoke inside the store (I’m totally NOT kidding about this), you might be able to get one cut to your specifications.  Four and a half pounds is a LOT of meat.  But the leftovers are delish.

1.  In a very large skillet or dutch oven, heat the 4 tbsp vegetable oil over high heat.  Don’t get nervous (like me) about turning up the heat – it’s supposed to be hot!  Season both sides of your hunk ‘o beef with a bunch of salt and pepper, and then plop it down into the hot pan.  Brown each side for about 4 minutes, and be careful when flipping it – that hot oil tends to spatter!

While the meat is browning, it’s a good time to mince up your garlic and slice your onions to prepare for the next step.

I gave her a nice dip in hot oil… She barely fit in that tub, but we made it work.

Is it weirding you out that I’m describing the food as though it were people?  Because I can stop.  I probably won’t, but I can.

2.  Stick the brisket in the crock pot, then add all of your other ingredients.  Simple, no?

Mmmm… delicious spices.

Molasses.  I’m not sure what purpose this serves, but it sure looks cool.

3.  Mix everything together, making sure the meat is covered with the liquids.  Then just cover and turn the crock pot on low, and walk away for about 10  hours!  (I got started on this a little later than I had intended, so I turned the heat up to high after about 7 hours, let it cook that way for an hour and a half, then put it back on low for another half hour.  I took it out after 9 hours of cooking, and it was still tender and delicious).

Seriously, though.  It smells so good after about an hour, you’re going to want to open that lid.  Don’t do it! Just let it cook.

4.  When she’s ready, remove the brisket from the pot and place her on a cutting board or large plate.  It matters not that she looks kind of funky.  Her tantalizing smell and the way she just falls apart between two forks is more than enough to make up for it.

And, once again, my finished product pictures are awful.

I don’t know what it is about tacos and wraps, but I just can’t photograph ’em.  So, check out Gaby’s post on her blog if you’d like to see a fantastic photo of the finished product.

Gaby recommends serving these with guacamole (it cuts the spice) and Mexican cheese.  I *gasp* nixed the cheese (the flavor of these is already good enough), but did make this avocado dip of yore to put on top.

Yum, yummy, yum yum yum.

You can pretty much garnish these however you want.  But make them.  The ingredients can be a bit pricey, but this will make a lot of meals.

Enjoy!

Indulge.

Back in what I like to call the “Golden Days,” when I could eat and eat and eat and never gain an ounce of body fat, back before I discovered wine and beer and the accompanying traces of cellulite that inevitably appear if I don’t pay a visit to Jillian within 24 hours of consumption, back when my butt stayed firm of its own accord, and back before the elves started forgetting to oil my joints at night – particularly in my left knee – which makes me feel like the oldest 28-year-old I know, I liked to bake.

A lot.

I rarely cooked, but boy did I bake.  Cookies and cakes and brownies and bars… I felt comfortable baking because everything was precise.  As long as I followed the directions, it was hard to mess up.  And even when I did mess up, I could eat the mess and it was still tasty, if not pretty.

But now that I’m old enough to consume the empty calories found in alcohol, I try to limit my baking to events and special occasions, because let’s face it – I don’t need the extra calories tempting me while I’m in the house all day long.

Then I stumbled upon this recipe.  This perfectly enticing, decadent, chocolaty recipe for double fudge Irish cream cookies that combines baking with alcohol – and not in a miniscule way – and I just had to make them on St. Patrick’s Day.

Because if a day when I’m allowed to pinch people if they aren’t wearing my favorite color isn’t a special occasion, I don’t know what is.

And I realized today that while I’ve been sitting on this recipe (and the extra layer of fat it’s undoubtedly formed on my derrière) for the past couple of weeks, I’m doing myself a disservice.

Because if I have to be fat from making and consuming ridiculously delicious desserts, so should you.

By the way, my photos of the finished product are horrible because I was too busy actually eating the cookies to worry about taking decent pictures.  Luckily, Jessica at How Sweet it Is took some amazing photos of her own recipe, and she might give you some healthy recipes and fitness tips to make up for her irresponsible posting of these muy rico delicacies.

The good news is, I bet you can eat just one – they are super rich.

To make them, you will need:

  • 1 cup butter, softened
  • 1 1/2 cups sugar
  • 2 eggs
  • 1 teaspoon vanilla
  • 2 2/3 cups flour
  • 1/2 cup cocoa powder
  • 1 1/4 teaspoon baking soda
  • 1/4 teaspoon salt
  • 1 teaspoon instant coffee powder
  • 8 tablespoons Bailey’s Irish Cream
  • 1 cup white chocolate chips
  • 1/2 cup chocolate chips

1.  Cream the softened butter, eggs and vanilla with a wooden spoon until fluffy.  I’m pretty adamant about the wooden spoon thing.  Sure, you could pull out your fancy, schmancy industrial mixer, but we’re making cookies, people.  Cookies should be made like our mothers and grandmothers made ’em.

With love and good old-fashioned elbow grease.

Except not real elbow grease, because that would be gross.

And who has greasy elbows, anyway?  If anything, mine tend to get quite dry.  If I’m not careful, I’ll end up with “ashy elbows” ala Tyra Banks and I don’t know anyone who wants to look like her.

2.  Add the Bailey’s and mix it in, one tablespoon at a time.

Now.  If you’re a dough-eater like me, you might think this tastes a little… strong.  But stick with me, here.  The taste of Bailey’s gets much subtler after the cookies bake.

And yes, I know eating dough with raw egg is bad.  But it’s bad in such a good way, you know?

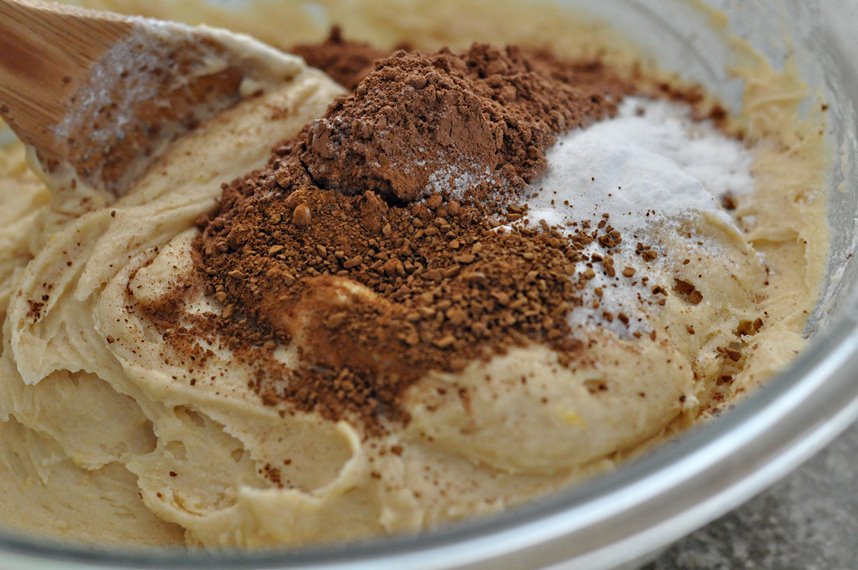
3.  Add the flour, cocoa powder, instant coffee (I crumbled mine up in the package a bit first), baking soda, and salt to the bowl.

Mix everything (again, with a wooden spoon – it’s imperative) until combined.

Be careful with the cocoa powder if you’re an enthusiastic mixer, like me.  It’s a bitch to get out of clothes.  Especially white shorts.  Seriously?  Who cooks in white shorts?

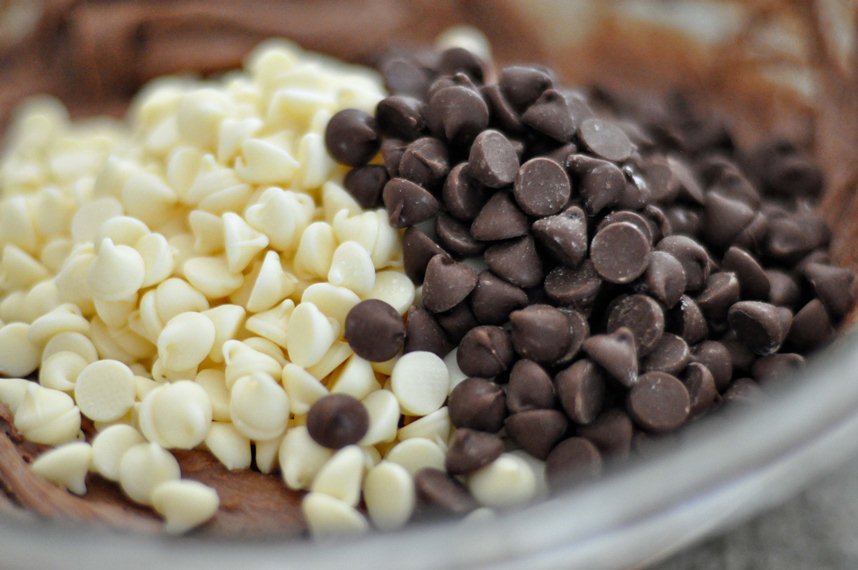
4.  Fold in the white and milk chocolate chips, then cover the bowl and refrigerate the dough for 4-6 hours (I actually refrigerated overnight, and it was still fairly sticky to work with).

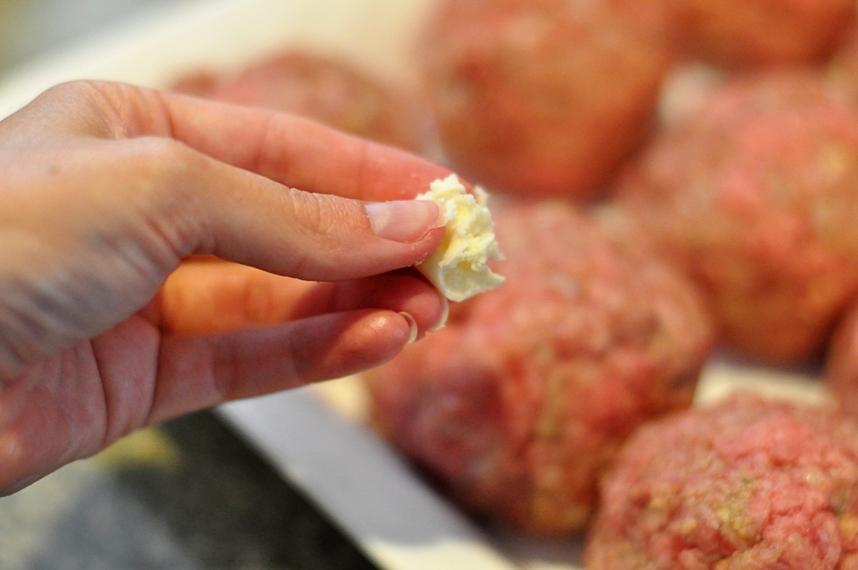
5.  When you’re ready to bake, preheat your oven to 350-degrees F.  Use your hands to roll the dough into balls.  I like my balls fairly big (tee-hee).  Bake the balls on an ungreased baking sheet for 8-10 minutes.  Since my balls were fairly big (tee-hee), my first batch came out slightly under-baked.

I thought that was perfectly fine.

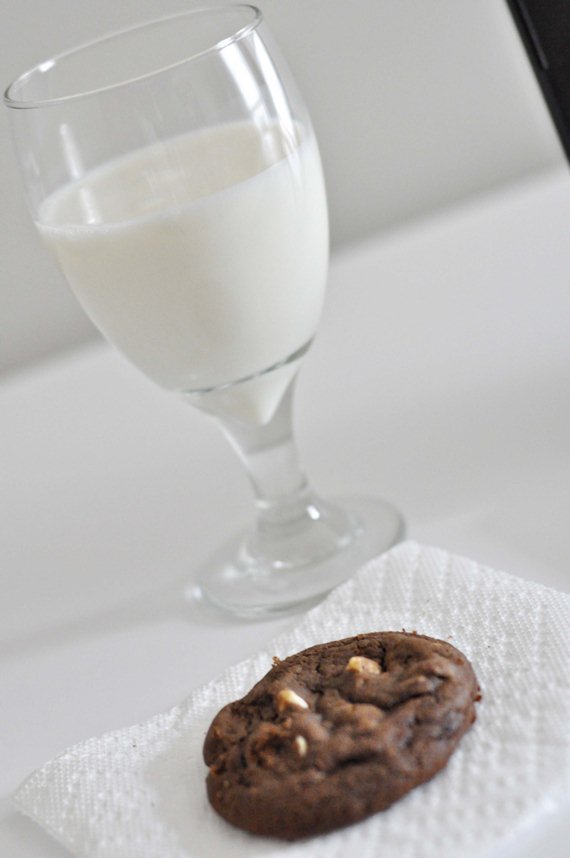
These cookies are moist, with almost a creamy, buttery center, ultra rich and decadent.

Jessica recommends eating these with a glass of Bailey’s, but the richness for me almost requires a glass of cold milk.

Indulgence doesn’t get much better than this.

Fake it ‘Till We Make it

Oh, boy.

Do I have a treat for you.

Have you ever had a mild panic attack when you realize people are coming to your house – people who might expect food – people who might expect cutsie, bite-sized, appetizer-ish food – and you pretty much can’t stand the idea of going through the work of assembling a million crab-and shrimp stuffed tartlets and mini cheese quiches?

Not that you would ever do that anyway, but you get my point.

So it’s a good thing for us that we can fake it.

I’ve discovered a tasty little treat (I actually might have ripped it off from a restaurant) that is so simple and so impressive and so delicious that you might just find yourself throwing it together for lunch on a lazy, rainy, Sunday afternoon while you sip wine and watch Breakfast at Tiffany’s.

Not that I would ever do that.

Except for maybe today and every lazy, rainy Sunday afternoon from here on out.

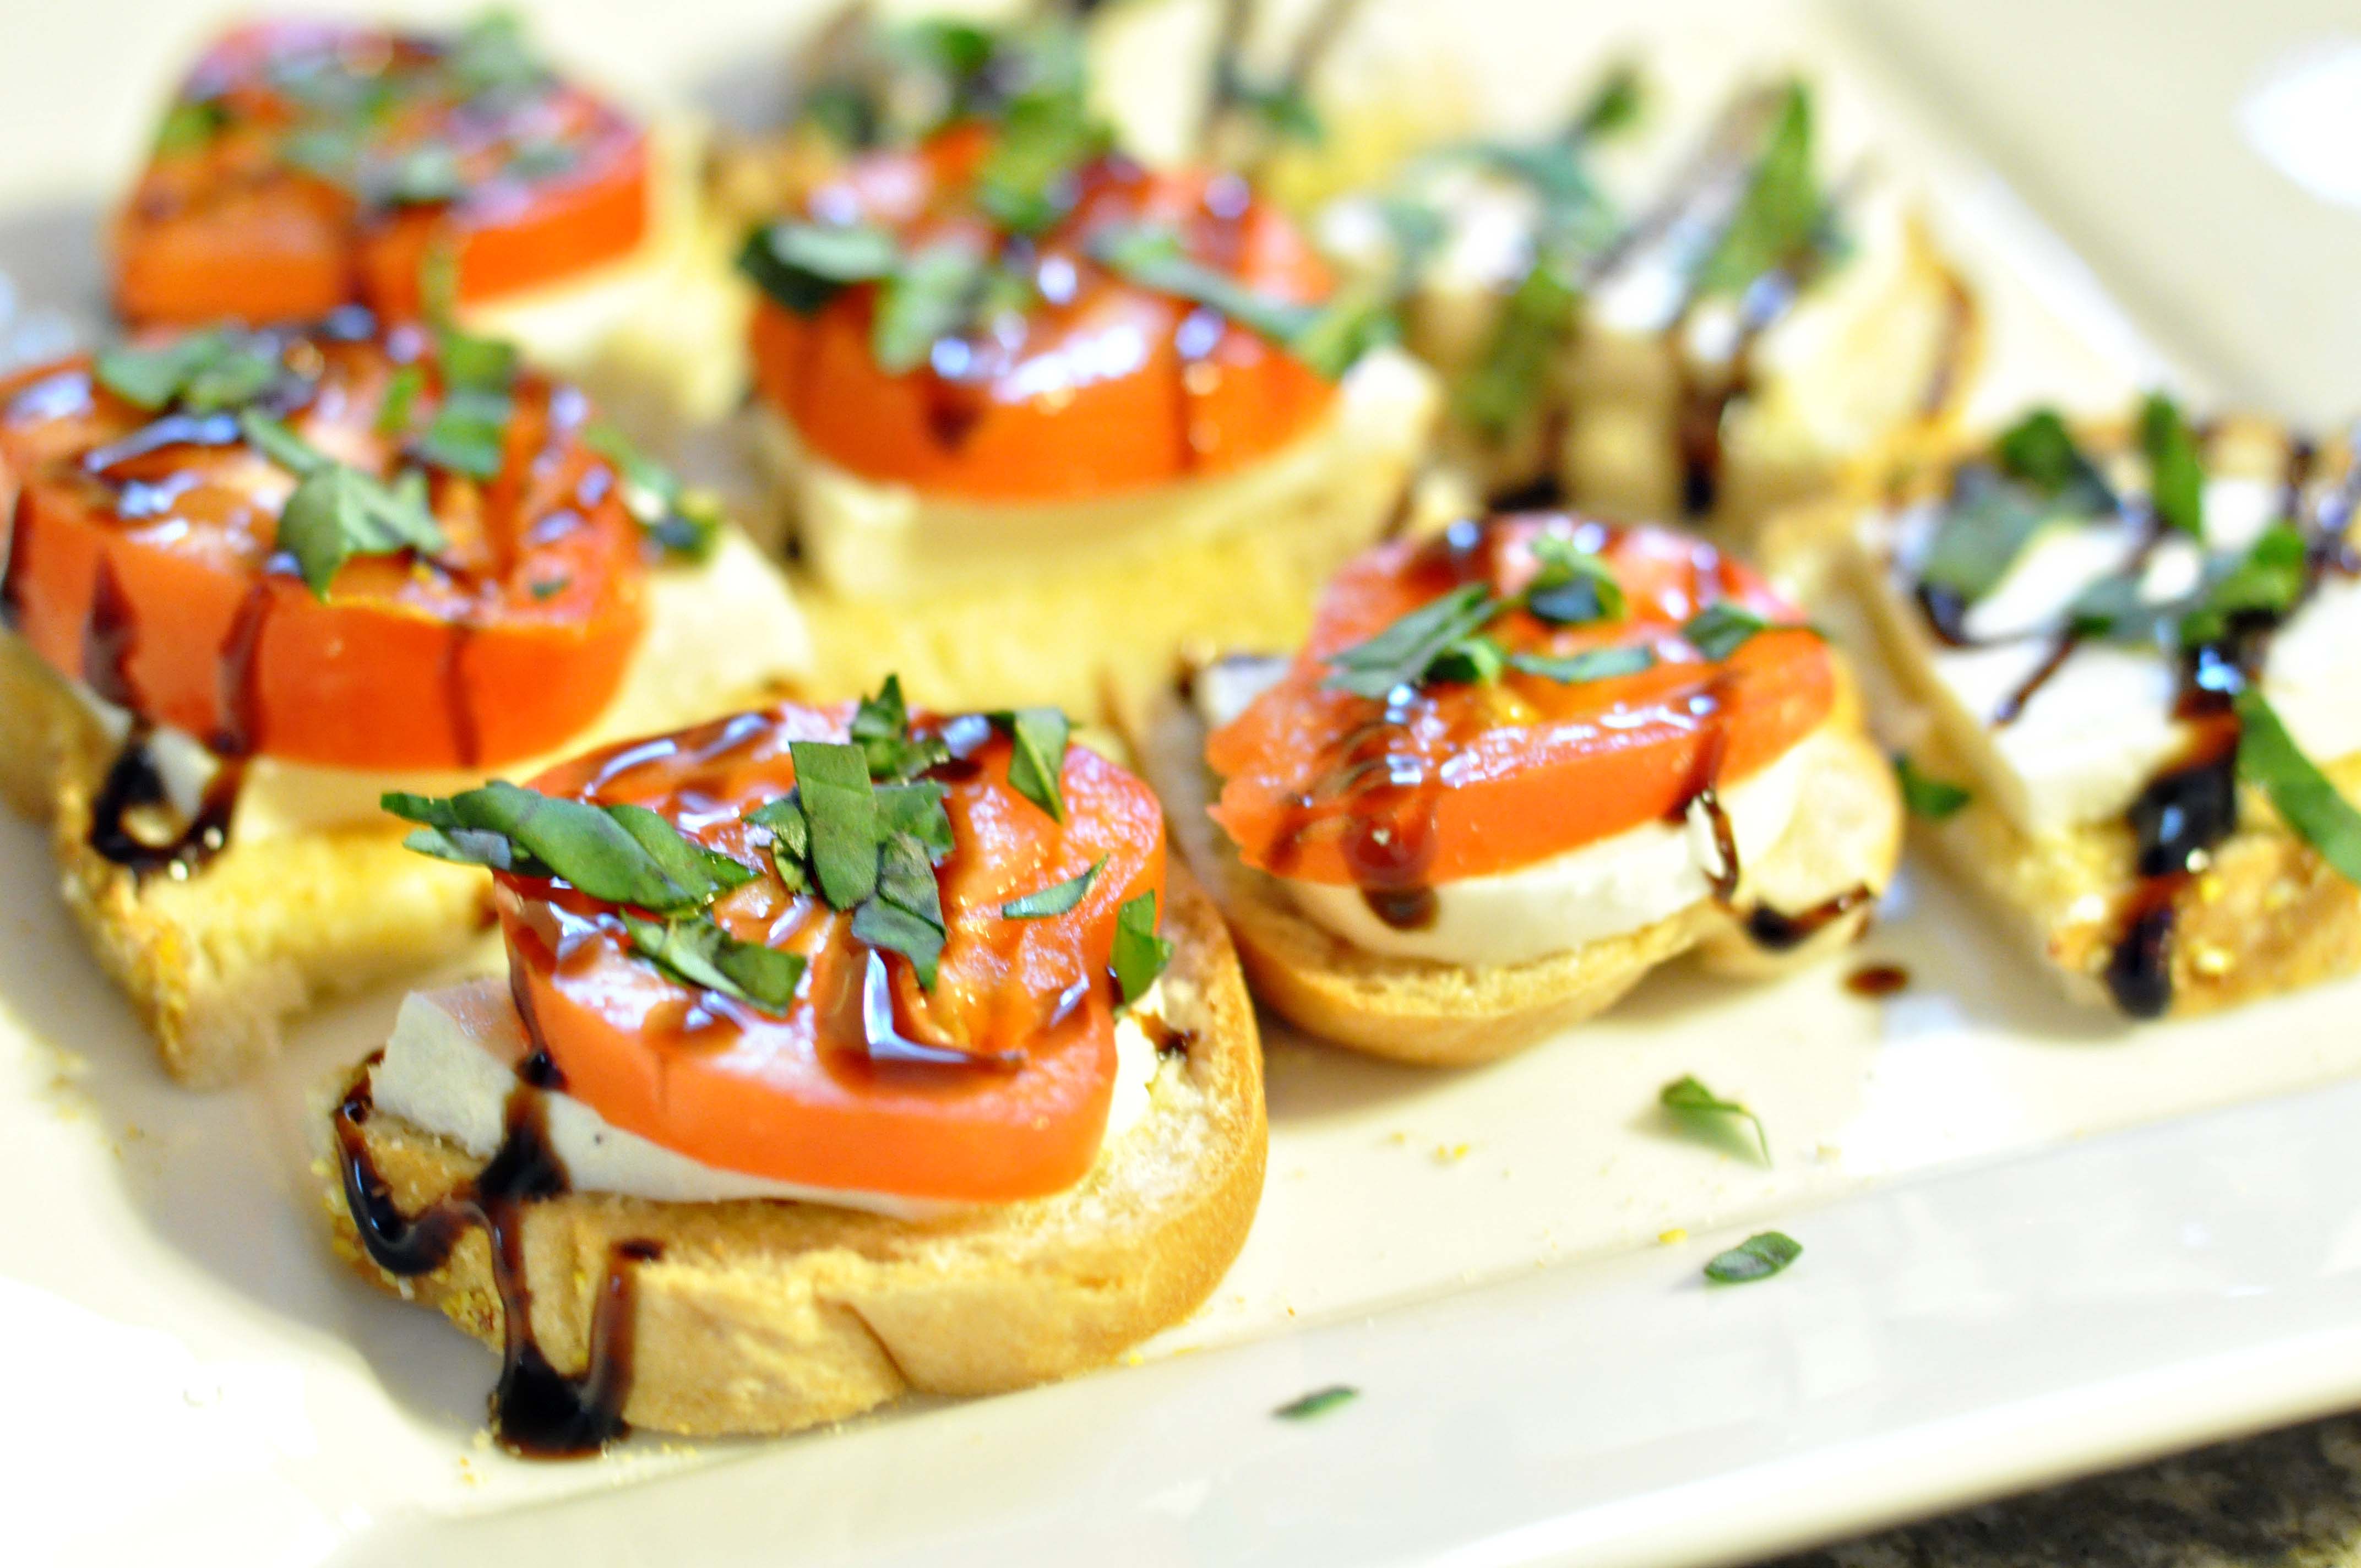
You only need a few ingredients to make this twist on a mozzarella caprese salad:

  • Some type of French or Italian bread
  • Butter or margarine
  • Garlic powder
  • Fresh mozzarella cheese (We’re talkin’ the ball of wet stuff – you can get it in the specialty cheese area of most grocery stores)
  • Fresh basil
  • Roma tomato
  • Balsamic glaze (this is something I found at my nicer grocery store.  I suppose you could use any brand, but I use H.T. Trader’s from Harris Teeter.  I found it where they sell the balsamic and other flavored vinaigrettes.)

1.  Slice and toast the bread.

2.  Spread a small amount of margarine or butter over the top and sprinkle with garlic powder.  (You could broil the bread with the margarine and garlic powder if you want to get all fancy, but my method works fine if you’re just making a small amount.)

3.  Place a slice of mozzarella and a slice of tomato on top of the bread.  Drizzle with the balsamic glaze, then sprinkle some chopped basil over the top.

Viola!

It’s that simple.  And it really does taste spectacular.

Anybody can make this and seriously impress some people.

Especially if you don’t show them the bottle of balsamic glaze.

Weekly Goals and Paninigasms. You Heard Me.

My friend Leslie was kind enough this morning to point out that I neglected to fulfill a promise I made last week about keeping you posted on my weekly goals so I can finally get a bunch of projects done around this wreck of a house.

I was supposed to tell you yesterday (Monday), but instead, I was actually working on fulfilling said goal.

But Leslie made me realize – If I don’t disclose the goals on here (or to anyone, for that matter), I’ll never get them done.

Because no one would give me a hard time about it.

And that’s what friends (and blog readers, who are practically friends because there isn’t much on here I don’t disclose about myself) are for – to give you shit when you start slacking.

Because they care.

I actually have 2 goals for this week:

1. Finish that damn closet so our coats can get off the guest bed and back into the closet where they belong.  Haven’t you heard?  It’s springtime, baby!

2. Sell a bunch of the “big” items taking up space in the garage and office so they can both get cleaned out.  That’s what I was working on yesterday – putting our old dining table, range, 2 office desks, and an office chair on Craigslist in the hope of selling them sometime this week.

Because this is what the garage looks like right now:

Nope, it ain’t pretty.

So far I’ve learned 2 things:

1. I priced the dining table and range too low.  I’ve gotten about a billion responses, and now I’m kicking myself for letting people convince me I couldn’t get very much for them.

2. Craigslist folk are unreliable.  The lady who was supposed to buy the range told me she’d be here before 10:00.  It’s now after 11:00, and she still hasn’t shown.  She’s probably going to be pissed when I call the next guy in line, but sorry lady!  You snooze, you lose.  This thing has got to go.

I should’ve known, though.  Erin warned us once about the perils of Craigslist:

So, yeah.  It’s not going that great so far.

On a completely unrelated note, have you ever seen the movie Spanglish with Adam Sandler?

It’s one of those movies that wasn’t originally my cup of tea, but for whatever reason I watched it again, and then again, and then again because there’s just something about it that’s so honest about human nature and our flaws and our idiosyncrasies that it just feels raw and real and… I don’t know… imperfect.  But that’s okay, because that’s the point.

Anyway.

There’s this scene where Adam Sandler’s life is just crap.  He’s an amazing chef with a beautiful house and family, but it doesn’t matter because things are falling apart in his marriage, the kids are suffering from huge self-esteem issues inflicted by their crazy mother who can’t recognize the reasons she’s so unhappy, his mother-in-law lives with them and happens to be a raging alcoholic, and their entire family is having a negative impact on the “pure” and holistic upbringing their nanny, who is a beautiful, single, illegal immigrant from Mexico, is trying to impart on her own impressionable young daughter.

And all of these things are weighing on him.  They tear him down every day.

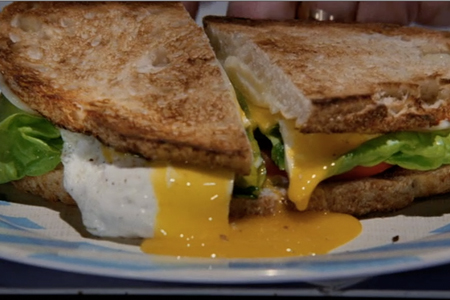
But in this scene he’s about to have a moment – a moment of pure bliss.  He’s fixing himself this amazing sandwich.  We’re talkin’ the mother of all BLT’s, with crispy bacon, fresh butterhead lettuce and ripe tomato slices, mayo (of course), and thick wheat bread with some Monterey jack cheese that’s been broiled to perfection, all topped off with a glorious fried egg whose yolk doesn’t break until he slices into the sandwich’s divine center belly, the golden fluids bleeding out onto the plate for a perfect dipping opportunity.

Then – then – he pours himself some kind of gourmet-looking dark beer into a tall pilsner glass (at which point I completely jizz in my pants) and the entire scene is done in silence with just the sounds of the egg being fried, the crack and fizz of the beer as it’s poured into the glass, the grate of the knife on the plate.

Perfection.

I will never forget that scene.  It’s like this moment he so desperately needs – just himself, the paper, the perfect sandwich, and a beer.

Of course, it all gets ruined for him before he can take the first mind-blowing bite, but that’s beside the point.

The point is that sometimes you don’t have to get too fancy to have a completely satisfying meal.  Sometimes a sandwich – a sandwich that you take a little care and time to prepare correctly – can be the perfect ending to an otherwise less-than-perfect day.

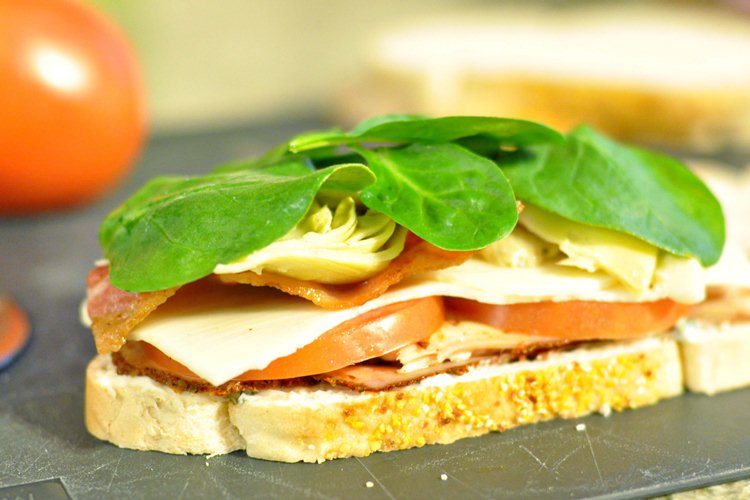
And I want to thank my sister, who reminded me of that last night when she encouraged me to make this:

Known henceforth as the “Orgasm Panini,” which, if executed correctly, could cause a paninigasm (thanks Jeff, for the term).

For a list of ingredients I used, check out the description of this photo on the Domestiphobia Facebook page.

Yep.  I’m sneaky like that.

***UPDATED***

Here are is the cast of characters for the Orgasm Panini (I figure it’s only fair if you stumbled across this later to not make you search for the ingredients) from bottom to top:

Some type of thickly sliced bread, mayo with lemon juice and basil, Cajun turkey from the deli, fresh tomato, freshly sliced or grated Mozzarella, cooked bacon, artichoke hearts, fresh baby spinach. Toast in panini press and enjoy.

Maybe even multiple times.

Lovin’ Marines and Coq au Vin

I just learned that the Marines are in town, apparently conducting their annual spring artillery training.  Which, incidentally, would explain why the ground is tremoring in this fault-free zone, my house is shaking out of sheer fright, and outside it sounds like “thunder” when there is no storm.

Gotta love living near a military installation.

Lately, with all the noisy aircraft flyovers, it feels like I’m living next to a major international airport without the convenience of… you know… living next to a major international airport.

But I have to admit – the planes are pretty sweet.  Sometimes they make for some fairly amazing backyard barbecue shows.

Unfortunately, I have yet to see something like this raining down over my backyard (they usually manage to hit the drop zones):

I have no idea from where this photo originated.  It’s very likely that it belongs to a local photographer, so if it’s yours and you want credit (understandably) or want me to remove it, please let me know.

Anyway.  This post isn’t going where I’d planned.

It’s just that those explosions are so distracting!  It’s like the handicapper ear buds George had to wear in the short story Harrison Bergeron, by Kurt Vonnegut.  They periodically make loud noises so George, who was smarter than your average bear, couldn’t concentrate, thereby making his thought process more on par with his simple-minded wife, Hazel.  And every time a loud noise went off in George’s ear, Hazel would see him wince and say, Boy, that one was a doozy, wasn’t it?

Aaaaaand I’ve distracted myself again.

What I really wanted to show you was what I made for dinner the other night.  Because I know you care.  And because I gave you a little teaser at the end of yesterday’s post:

Now, I’m not gonna lie.  There’s a bit of work involved in this one.  But it’s not hard.  It’s just work.  Work of the chopping, browning, and simmering variety.

Work I don’t tend to mind.

And I have to say, this is the recipe that you tuck away for special occasions or when you really want to impress someone.  Especially if that someone has a Y chromosome and a bunch of testosterone floating around where logic and reason would normally reside.  (Ha! I’m kidding.  You know I love you, boys.  Almost as much as I love my girls.  It’s the chromosome thing.)

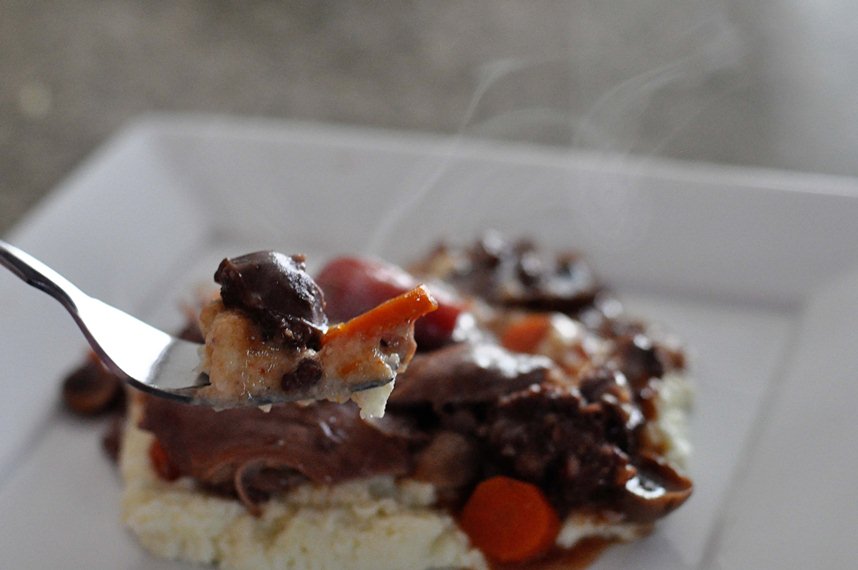
The recipe is Coq au Vin – with an Italian twist.

Don’t let the fancy name scare you – it’s just chicken (well, literally rooster, but we’re gonna go ahead with chicken) and wine.  The Italian twist comes from the sausage.  Because you know I can’t just use chicken and leave well enough alone.  I like my greasy meats.

The genius original recipe can be found right here.

You could serve this over rice, pasta, or even mashed potatoes, but I chose a bit of a unique route.  Since the recipe isn’t exactly healthy, I decided to make faux mashed potatoes out of cauliflower, which I’ve done before with much success.  (Thanks Tracy for the fantastic recipe!) Of course it’s not quite the same as real mashed potatoes, but with a hefty helping of Coq au Vin alla Italiana over the top, who the hell cares?

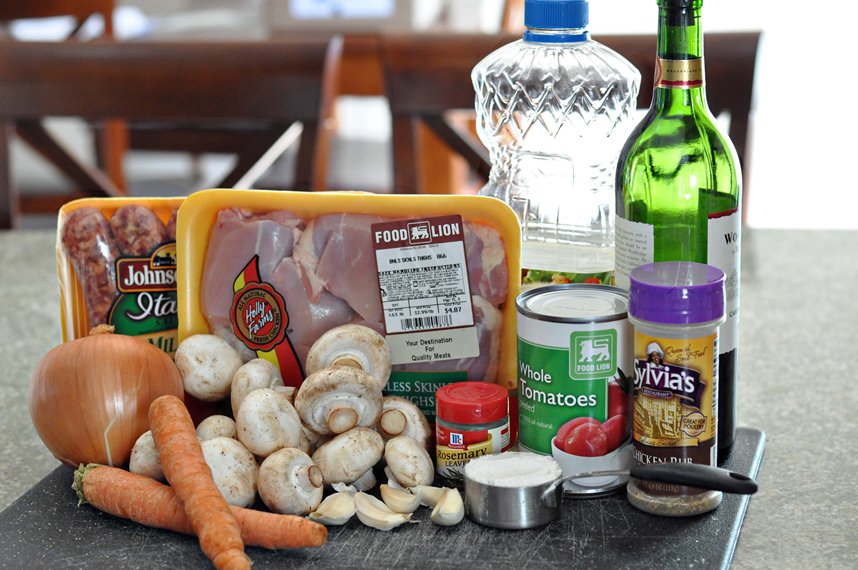
Here’s what you need to make it the way I did (I cut the amount of chicken in half, but kept everything else pretty much the same):

  • 2 lbs. boneless, skinless chicken thighs (this might even taste better with bone-in meat, but I didn’t want to deal with it)
  • 1/4 cup flour
  • 1/2 teaspoon poultry seasoning
  • 1 Tbsp. vegetable oil
  • 5 cloves garlic, minced
  • 3 (4 oz.) links sweet Italian sausage, sliced (I actually had to use mild Italian sausage because my po-dunk grocery store didn’t have the sweet stuff.  I think the sweet stuff would’ve been better.)
  • 1 cup onion, chopped
  • 3 carrots, sliced
  • 1/2 lb. fresh mushrooms, sliced (I used more like 3/4 lb. because I bought them in bulk. I looove me some mushrooms.  And I knew I’d have plenty of sauce since I used less chicken.)
  • 1/2 tsp. dried rosemary
  • 1 cup red wine
  • 1 (14.5 oz.) can whole, peeled tomatoes
  • salt and pepper to taste
Coq au Vin ingredients

Whew.  That’s a LOT of stuff, I know.  But it also makes a LOT of food.

1.  Heat the 1 tbsp. of vegetable oil in a skillet over medium-high heat.  (I use my enameled cast iron dutch oven for this, because it allows me to make everything in one, single pot.  But if you don’t have one of these, that’s okay!  Just use a regular frying pan for this first part.  You’ll just have more pots to clean – sucka!)

While your pan is heating up, mix the flour and poultry seasoning together in a shallow dish.  (I like to use a pie pan.  Don’t ask me why.)

2.  Dredge the chicken in the flour mixture, then throw about half of your minced garlic into your preheated skillet and add the chicken to brown for a couple of minutes on each side.  Keep in mind that you’re not trying to cook the chicken, here – there will be plenty of time for that soon enough.

3.  Meanwhile, wash and chop your onion, mushrooms, and carrots.  (And you don’t have to peel your carrots, but I do.  I think they’re…I don’t know…nicer that way.  You know, as opposed to mean, dirty carrots.)

4.  When the chicken is browned, throw in your sliced sausage links and stir ’em around.  Let that cook for another few minutes.

5.  Add the carrots, onion, mushrooms, rosemary, and the rest of the garlic to the mix and stir everything together.

6.  Finally, add the wine and can of tomatoes (including liquids).

Notice the smell.  Oh, the smell.  It’s times like these I wish they had scratch ‘n sniff computer screens.

Stick a lid on your pot, turn the heat down to low, and let everything simmer and come together in a veritable orgy of deliciousness for about 25 minutes.  Then season with some salt and pepper (don’t forget to taste it!) and let it simmer for another 10 minutes or so.  The chicken will be nice and soft, the veggies will be cooked, and everything will smell oh, so delicious.

*Note: My sauce was still a little thin for my taste, so I added a tablespoon of corn starch to 1/4 cup of cold water and stirred it into the pot to thicken things up a bit.

7.  Serve alone in a bowl, or over cauliflower “potatoes,” regular mashed potatoes, brown rice… whatever floats your boat.

And if you have any of that red wine left, be sure to drink that, too.  Because, if anything goes with coq au vin, it’s… vin.

“Gee – I could tell that one was a doozy,” said Hazel.

“You can say that again,” said George.

“Gee -” said Hazel, “I could tell that one was a doozy.”

from Harrison Bergeron